How To Convert More Web Traffic To Leads With Landing Pages
In this blog post, we are going to show you:
- Why landing pages are so important for your business
- How they can help you generate more leads online
- How easy they are to set up inside of REI Blackbook
In a recent post, we talked all about how to build a website in 30 minutes or less, why a website is important and why it's definitely something you need for your business.
But while websites are great, the home page is not always best place to drive traffic with your lead generation efforts.
Best practices among savvy online marketers is to drive drive potential customers from their marketing campaigns to a lead capture page or landing page.
What is the Difference Between a Home Page and a Lead Capture Page?
The home page of a website typically has lots of information and options for things to click on:
- navigation menu
- information about the product or service
- social media links
- cta buttons
- phone numbers
Namely? It's got a bunch of distractions that keep people from taking the action you want them to:
Putting their information (think name and email address) into the form fields of your web form and following the call to action to submit it to you so you can follow up with them.
If you are spending money to drive traffic to your business online, you want to be sure to send them to a type of landing page that is optimized to increase conversion rates.
And what does it mean when a landing page design is properly optimized?
There are several things you'll want to include:
- A “call out” to a very specific audience (People in your market who want to sell their house fast)
- A very specific message (Example: “Do you need to sell your house fast in Nashville? We can make you a fair cash offer and close FAST”)
- A very specific call to action (“Enter your info below or call this phone number to receive your fair cash offer.”
Are you noticing a trend here?
Specificity is key.
You want to remove all of the distractions (like a navigation menu) and only give them ONE thing on the page they are able to click on: the call to action you're driving them to.
If you have an existing REI Blackbook website, these pages are extremely easy to create, and we're going to show you how.
And if you prefer a video walkthrough to the blog post, be sure to watch this full tutorial by our marketing director, Josh.
How to Create a Landing Page from Your Existing REI Blackbook Website
When you've logged into your REI Blackbook account, from the Dashboard you're going to click “View Websites”.
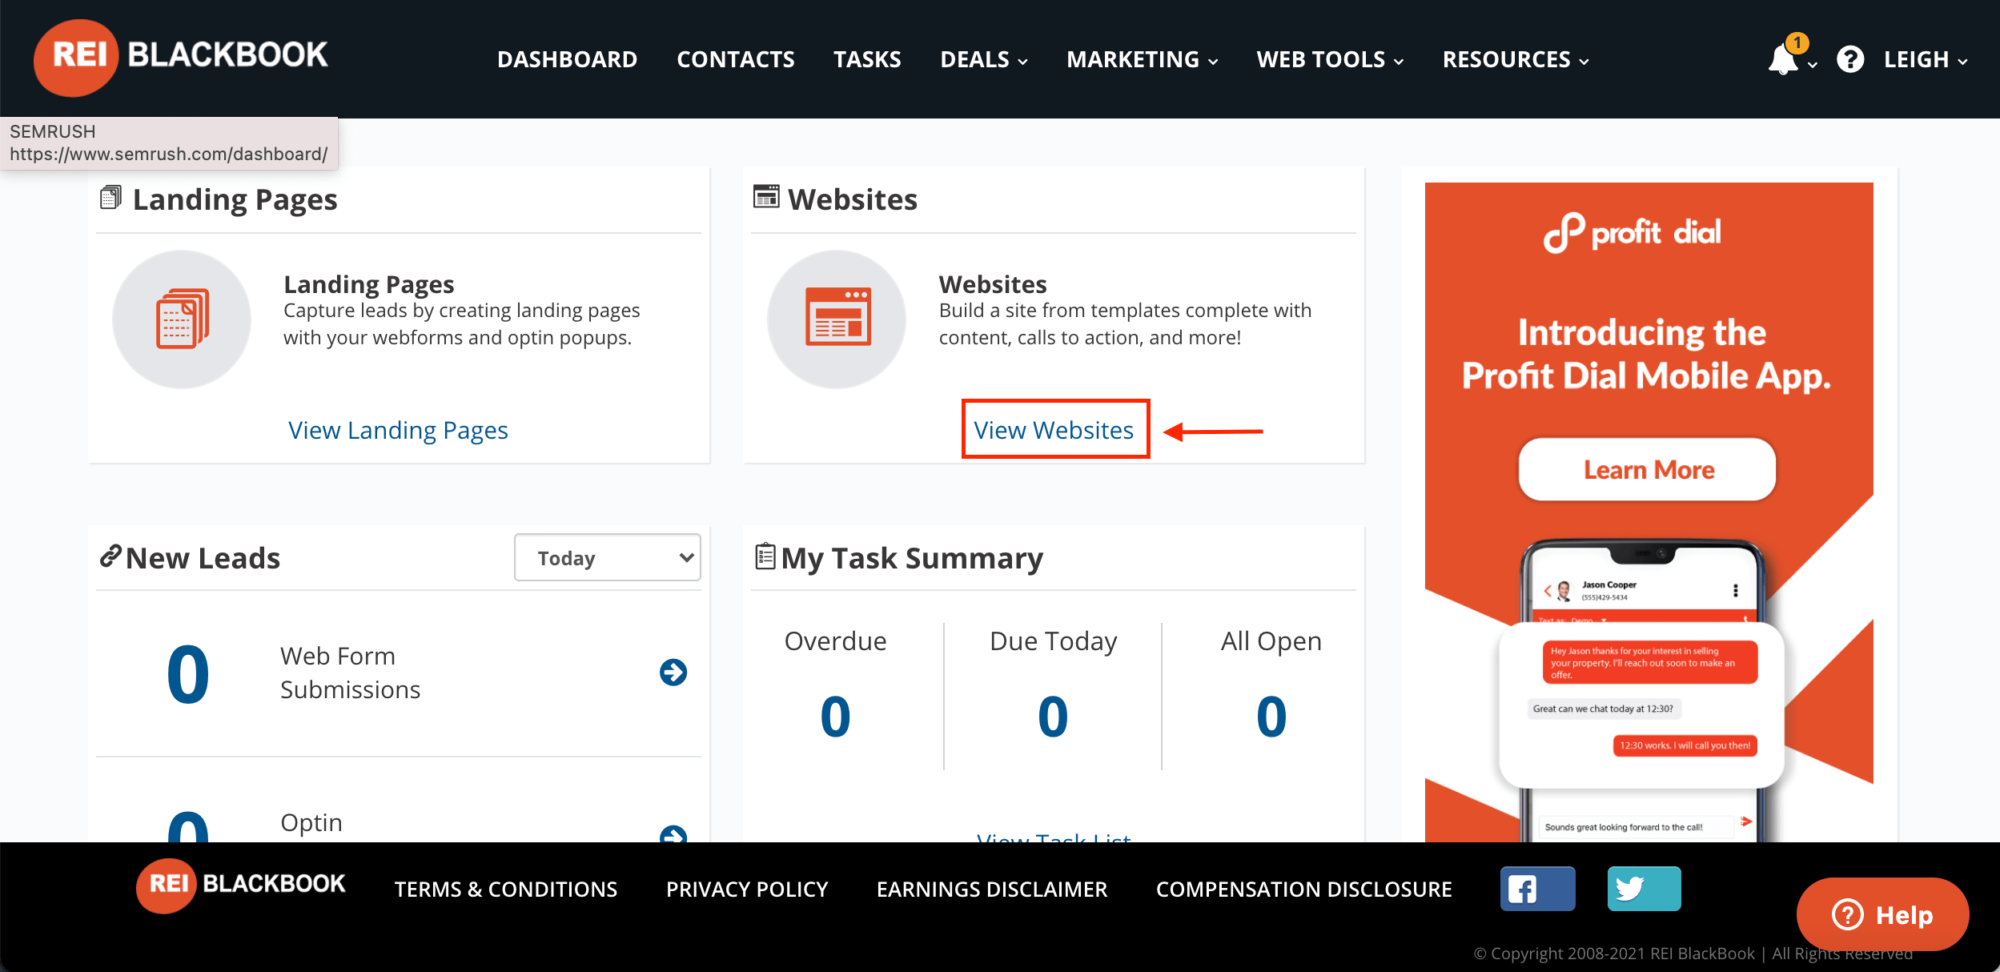
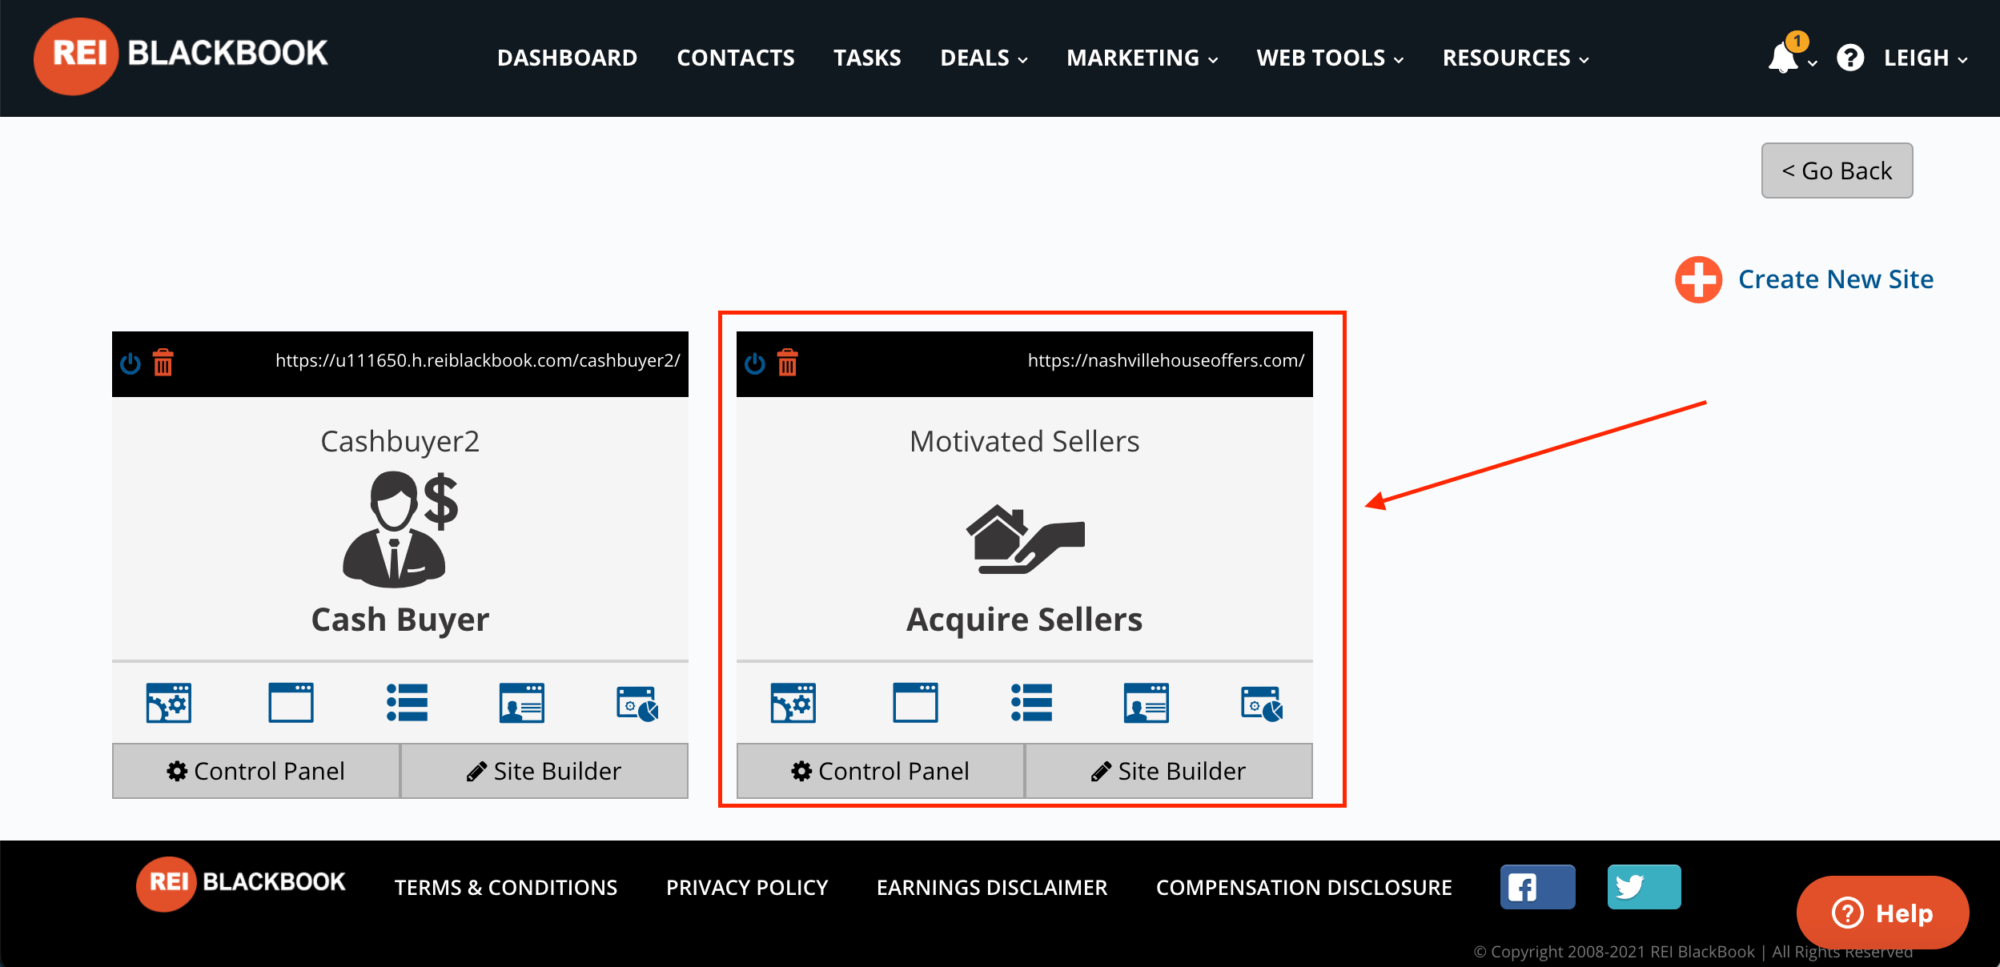
Select the website you want to use to create your landing page.
(We're going to use website one we showed you how to build in less than 30 minutes in this blog post.)
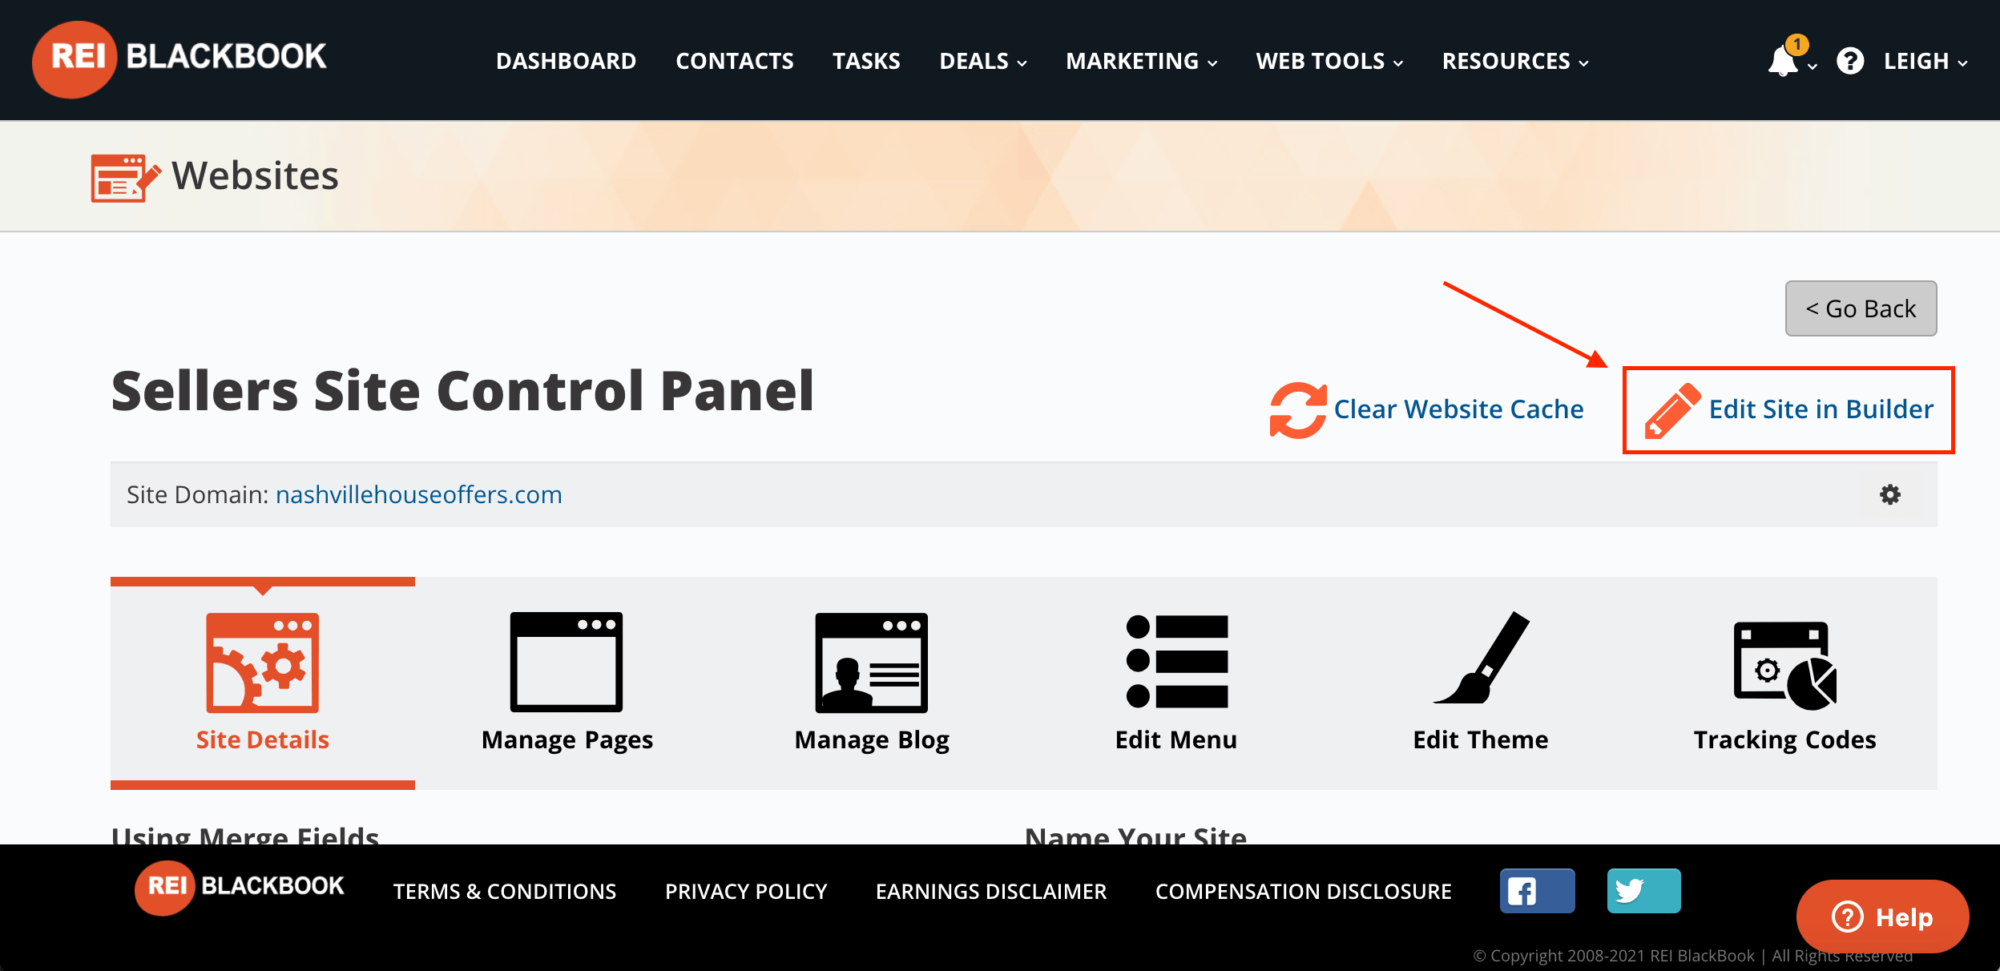
Once you're inside of your website control panel, select “Edit in Site Builder”.
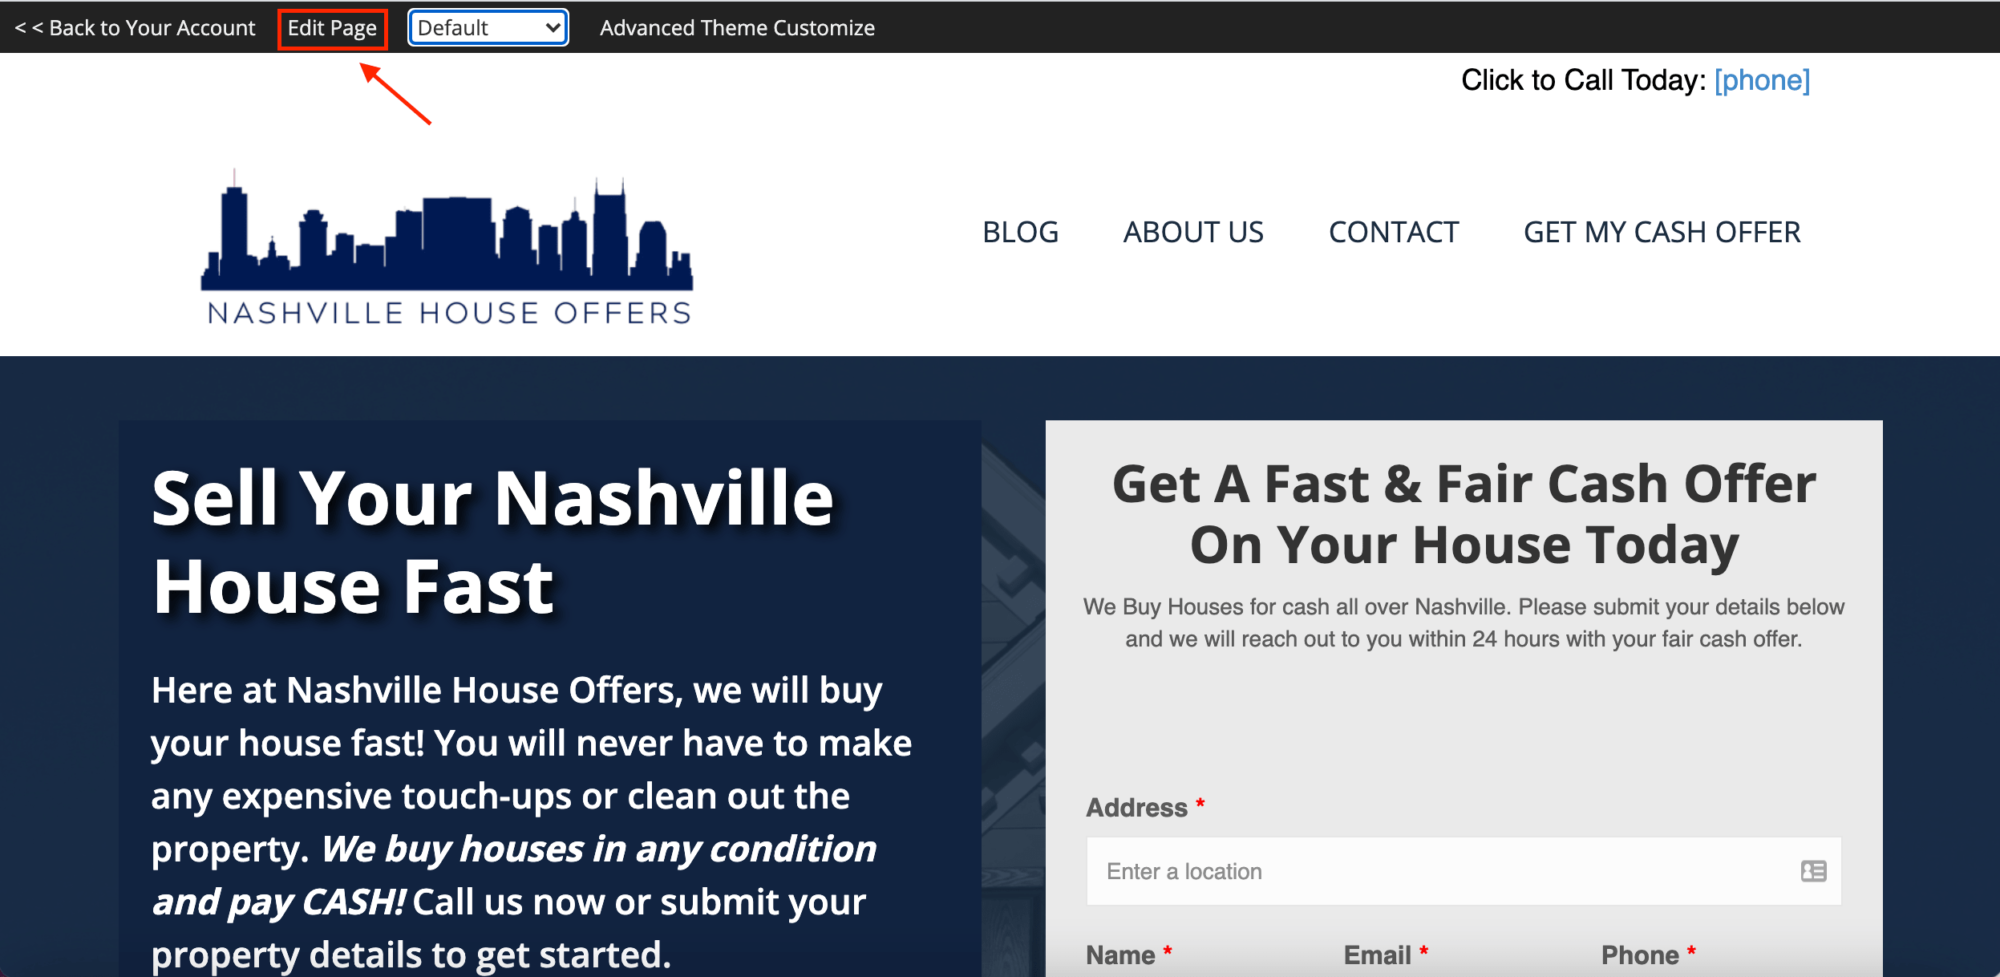
This is going to take you right to the home page of your website where you'll click “Edit Page”.
Once you're in the page builder click “Tools”.
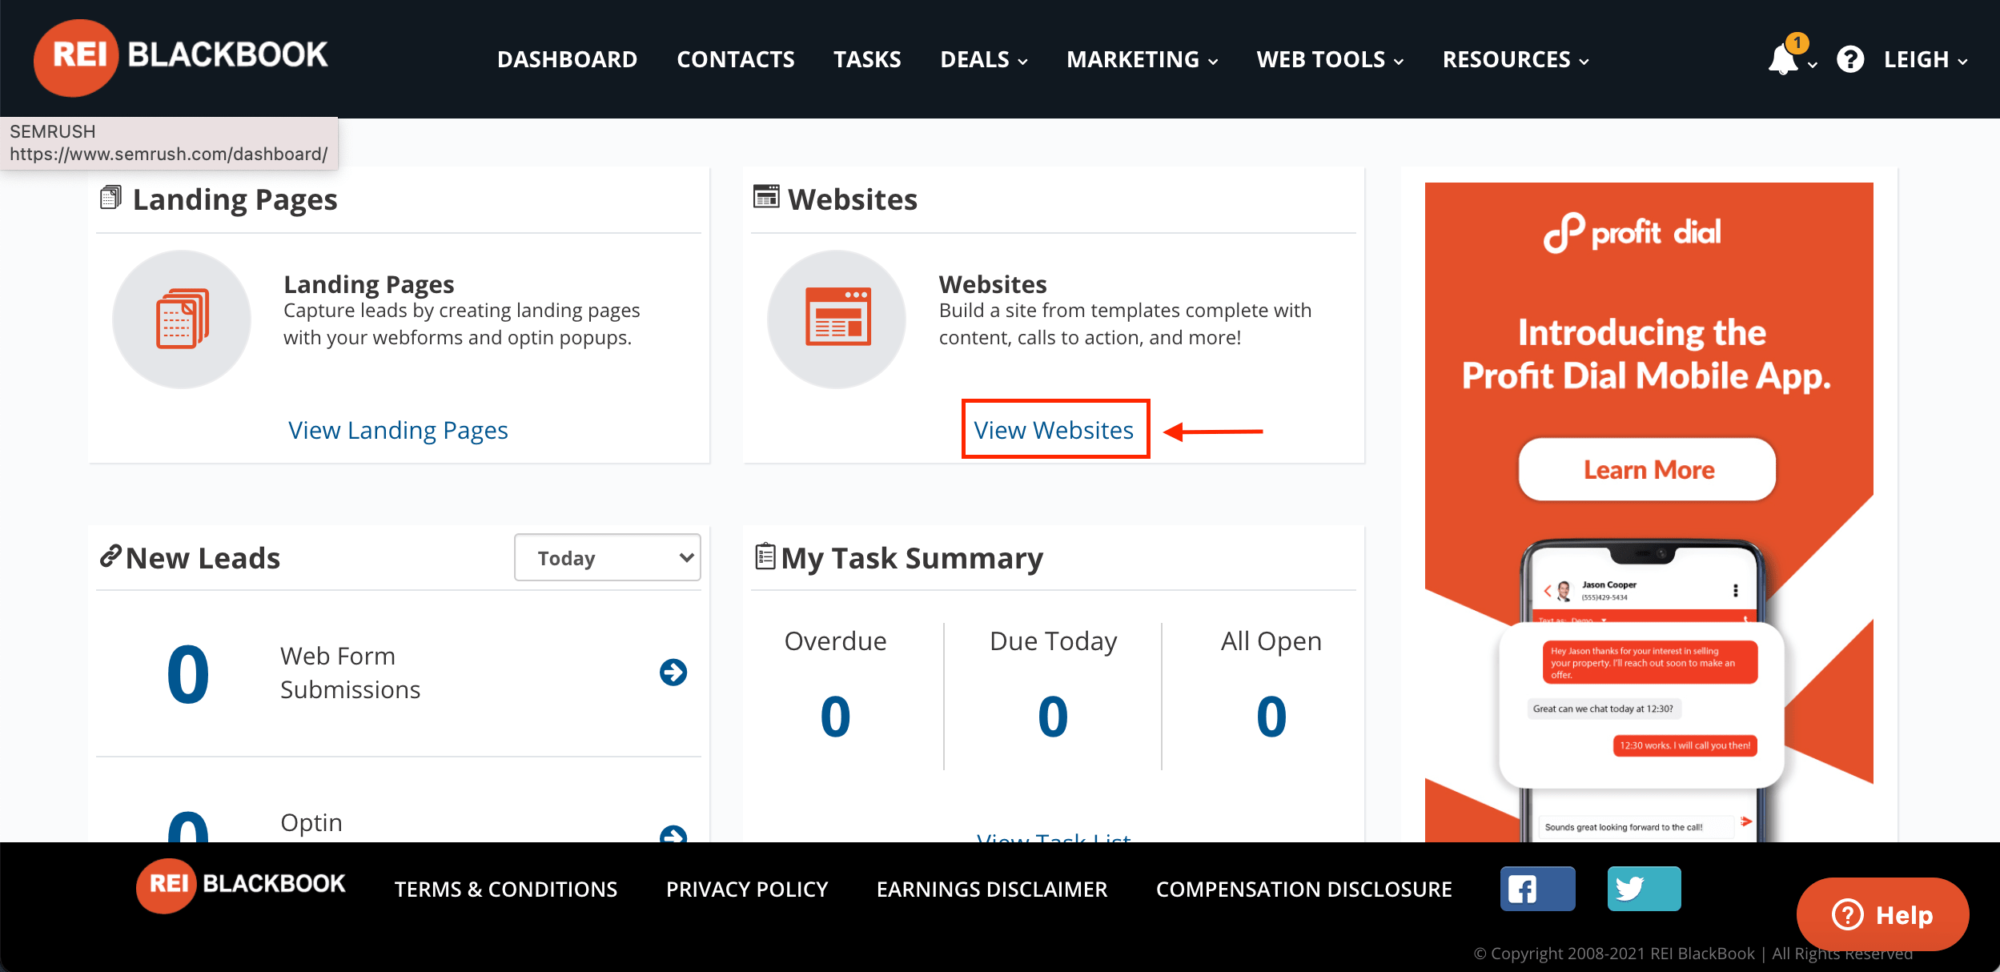
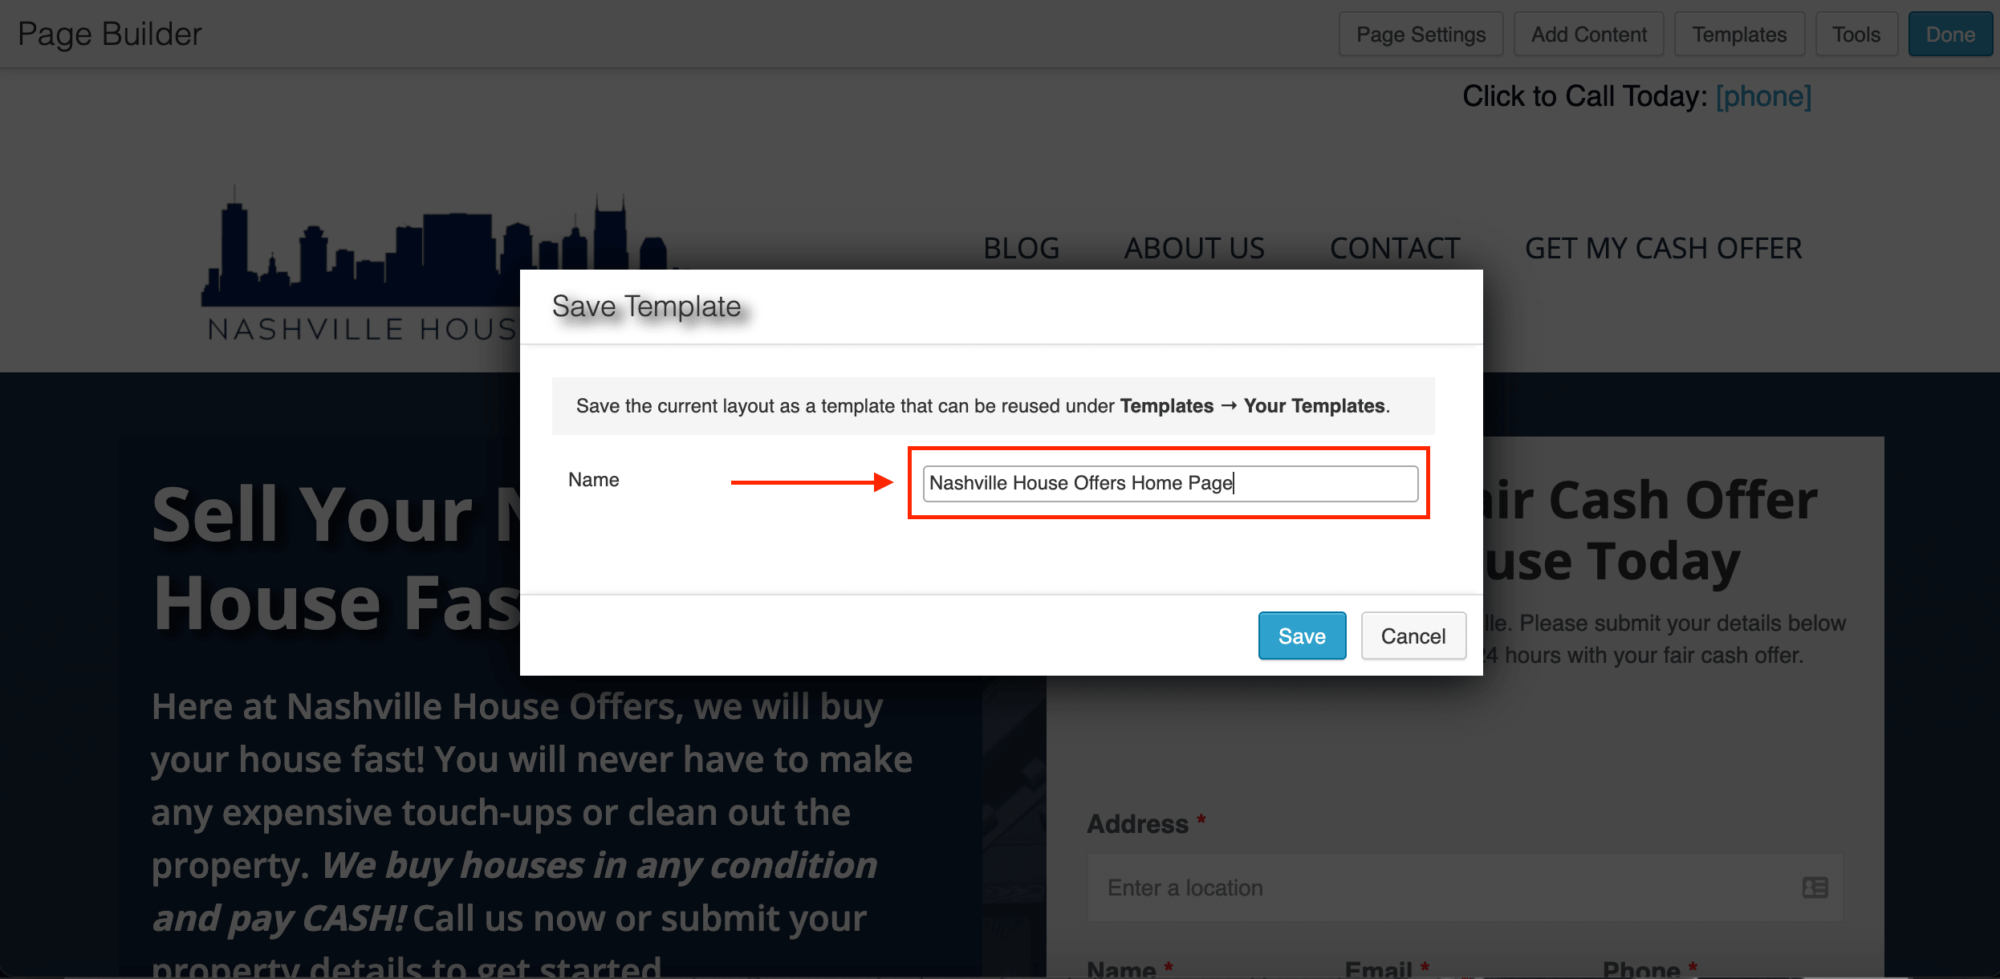
Choose “Save Template” and give it a name.
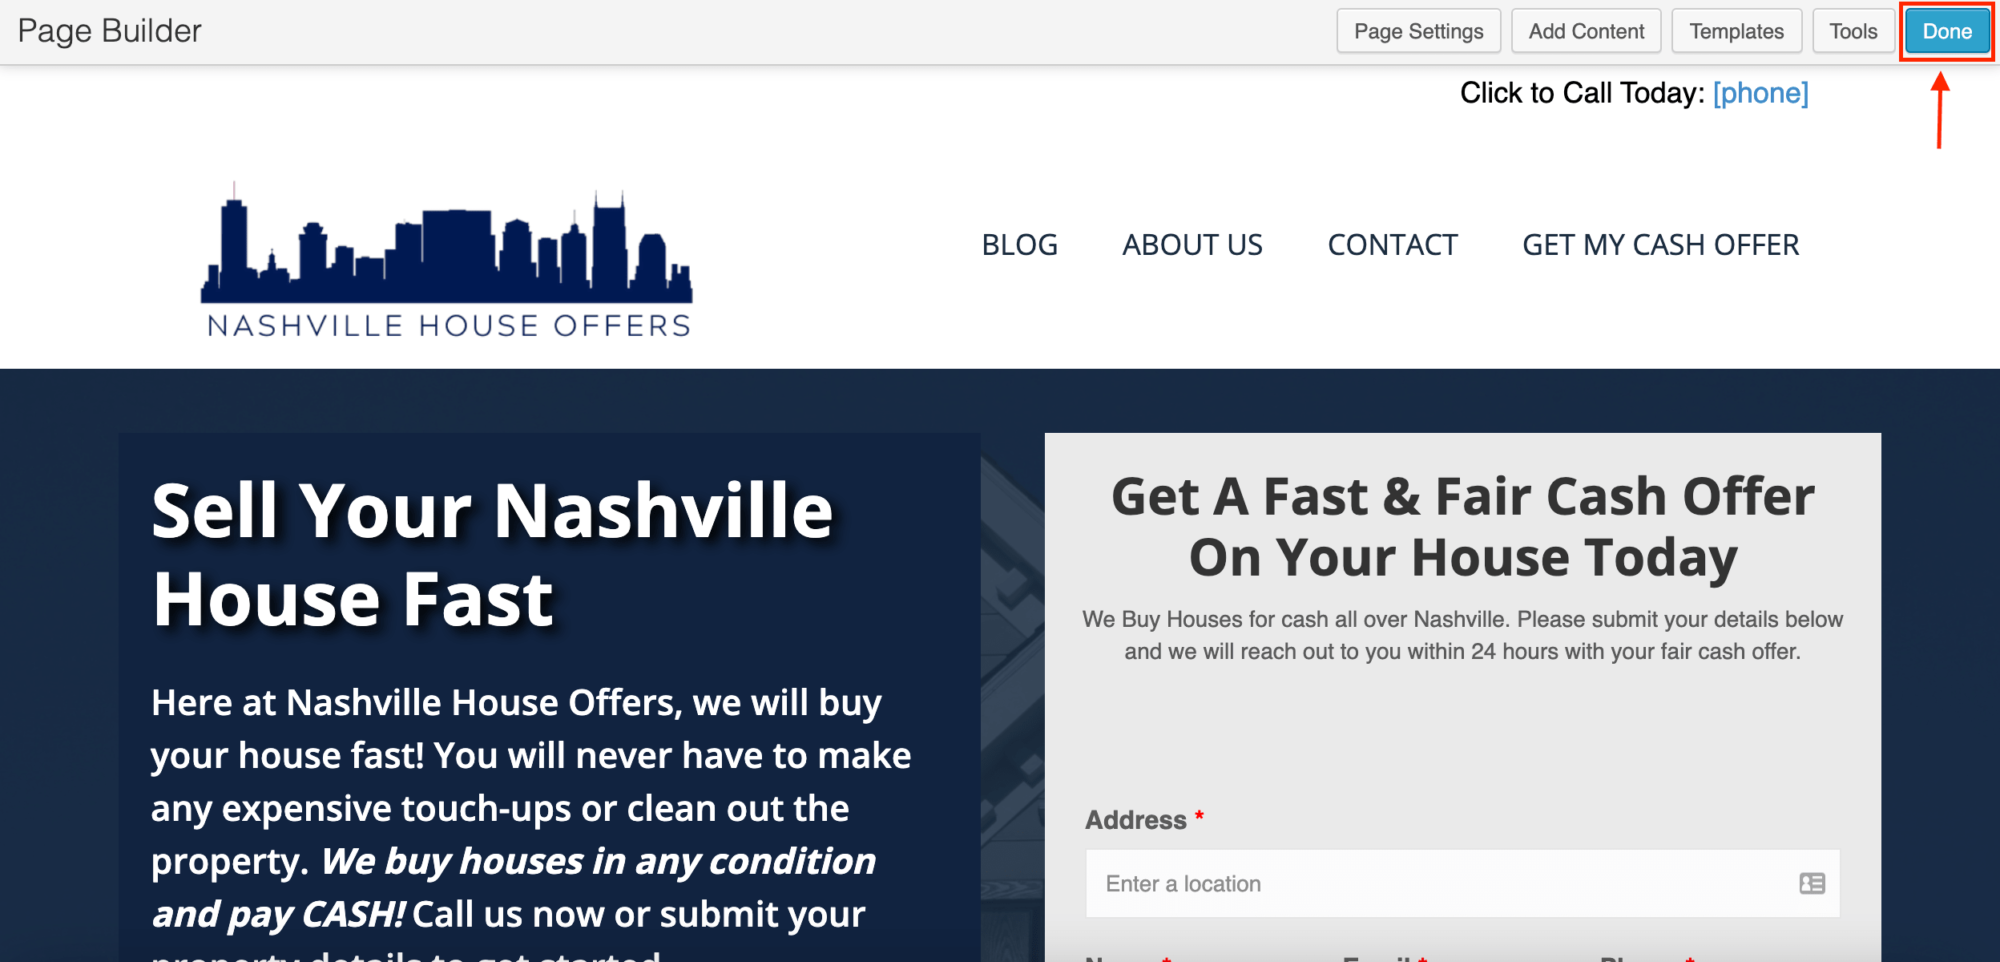
Click “Done” and then select “Publish Changes”.
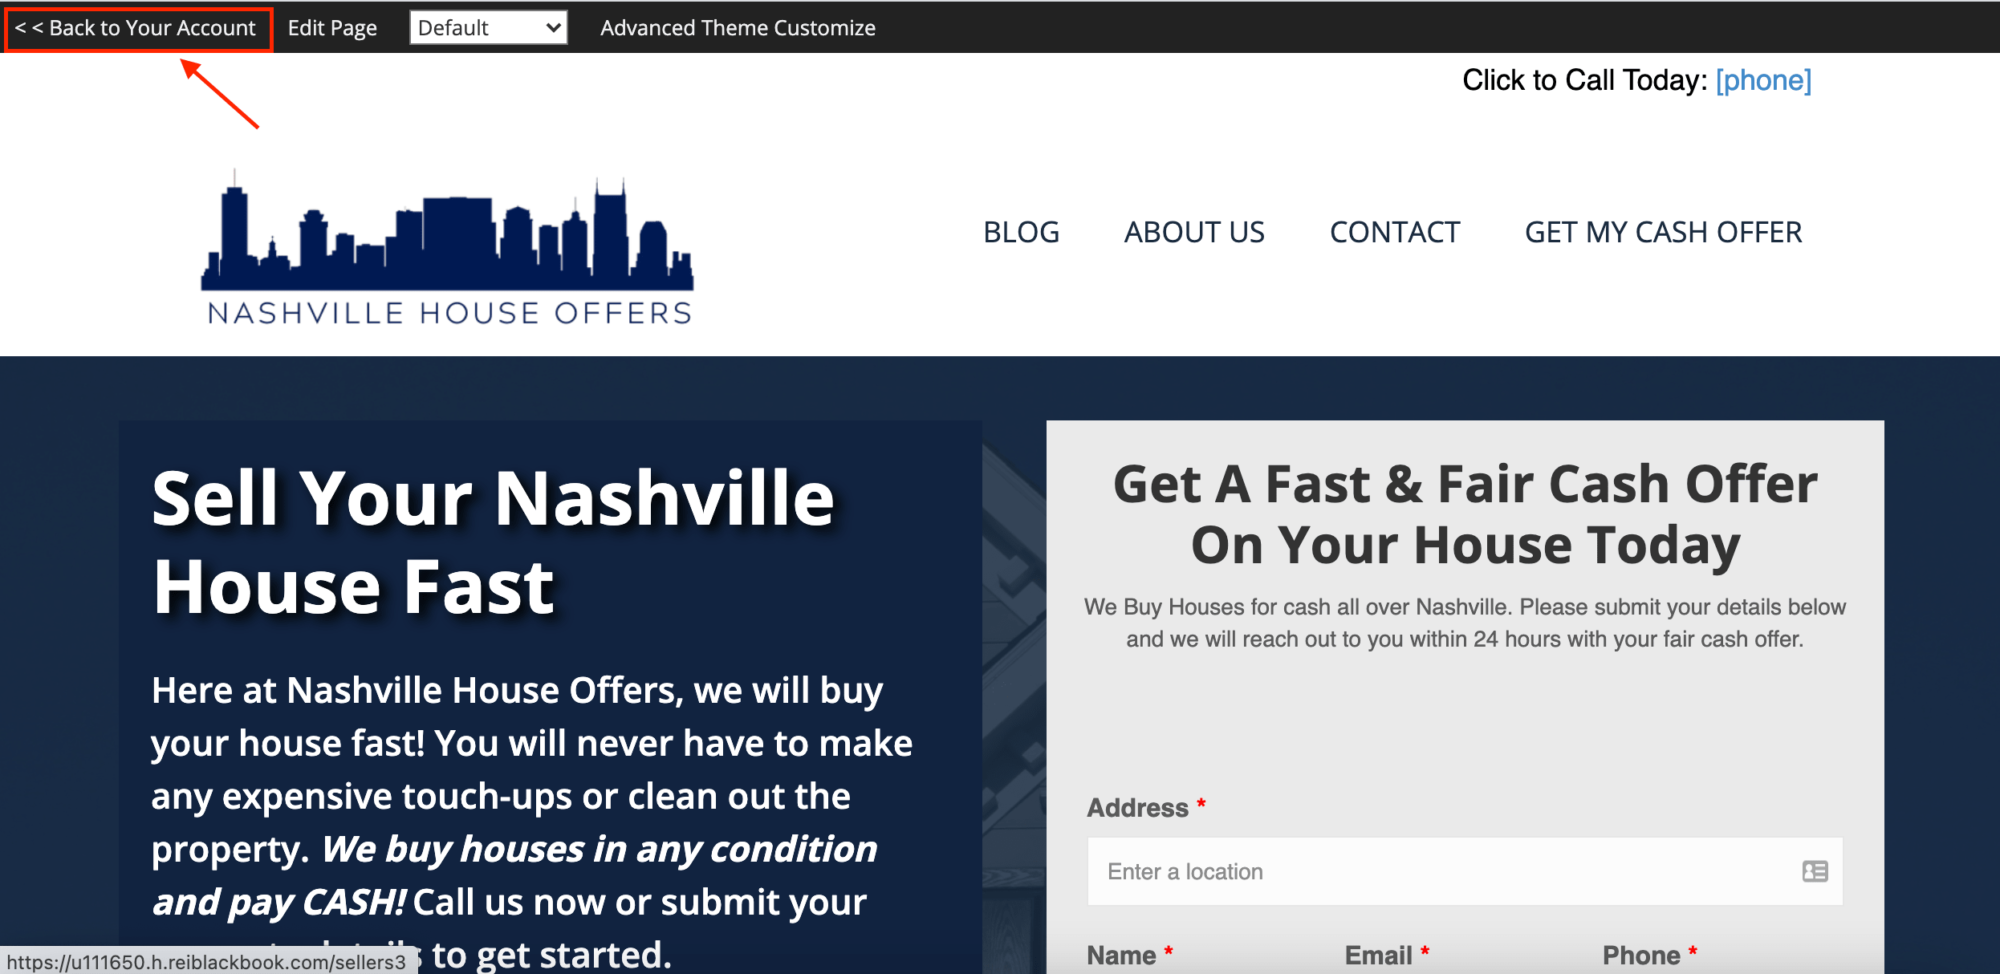
Head back to your Website Control Panel by choosing “Back to Your Account”.
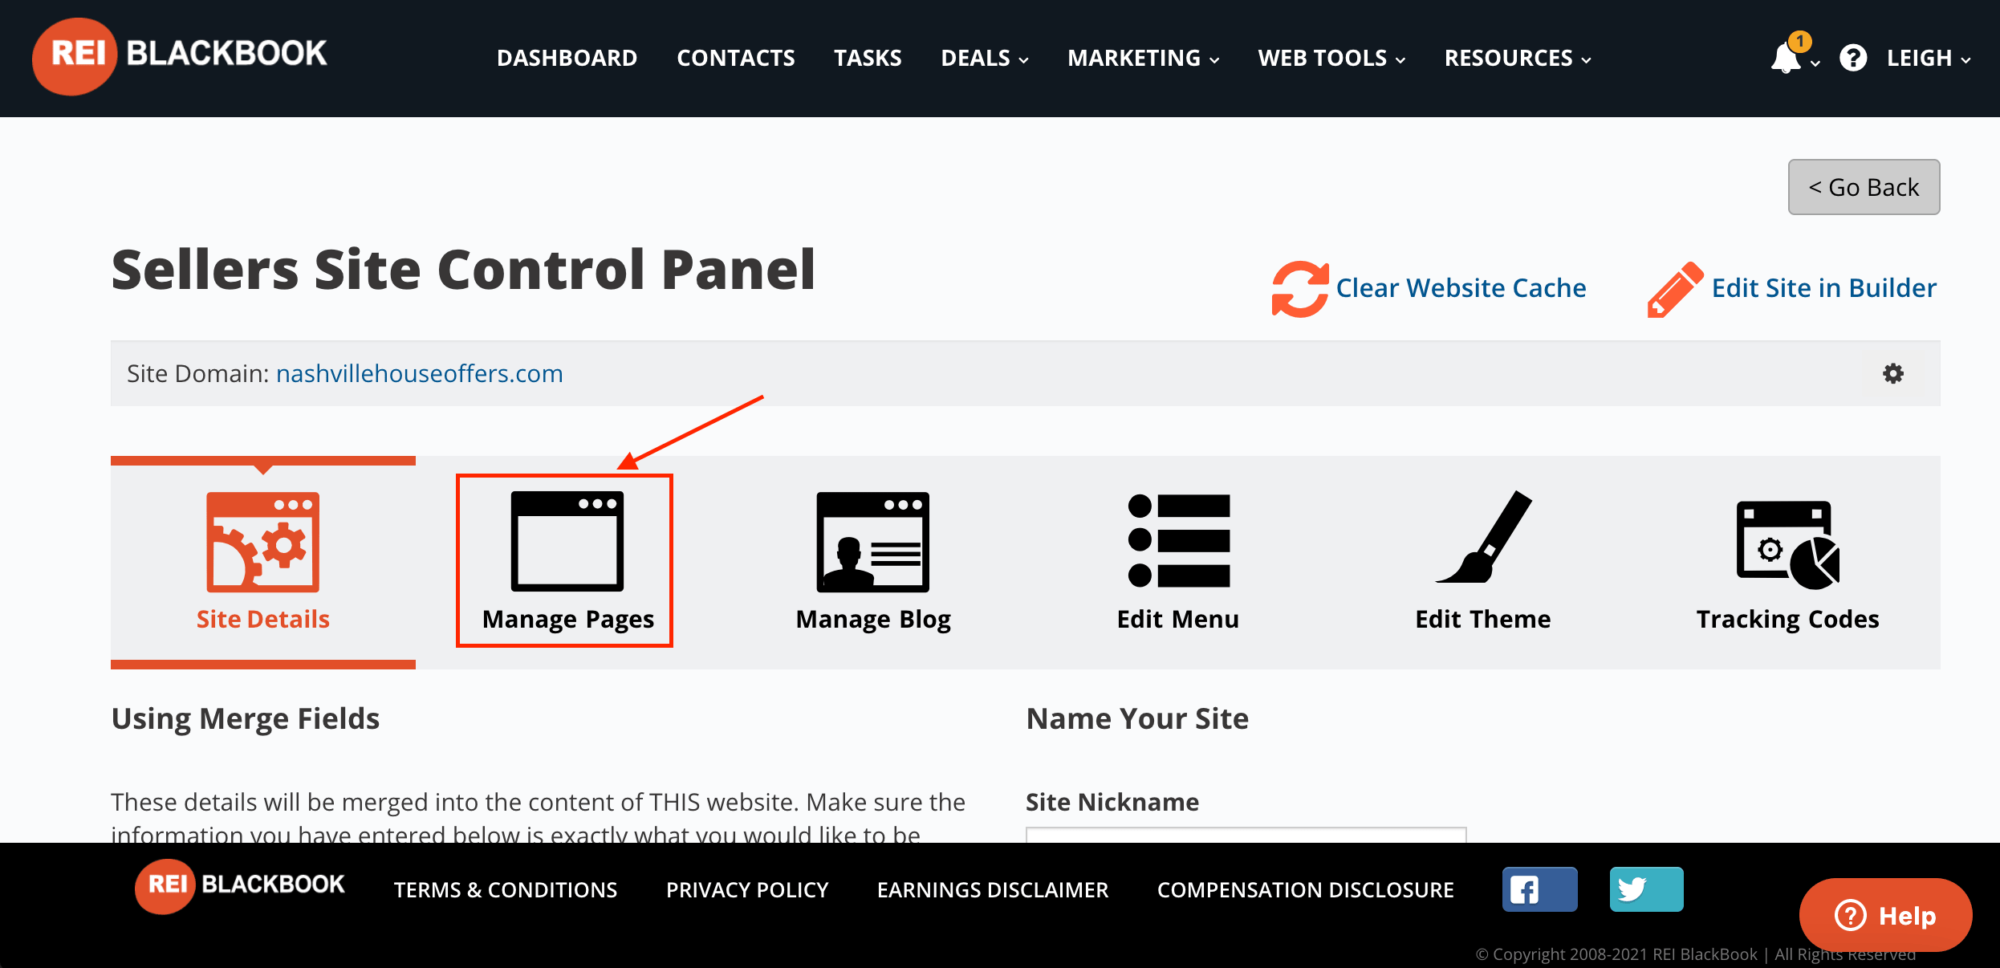
Choose “Manage Pages.”
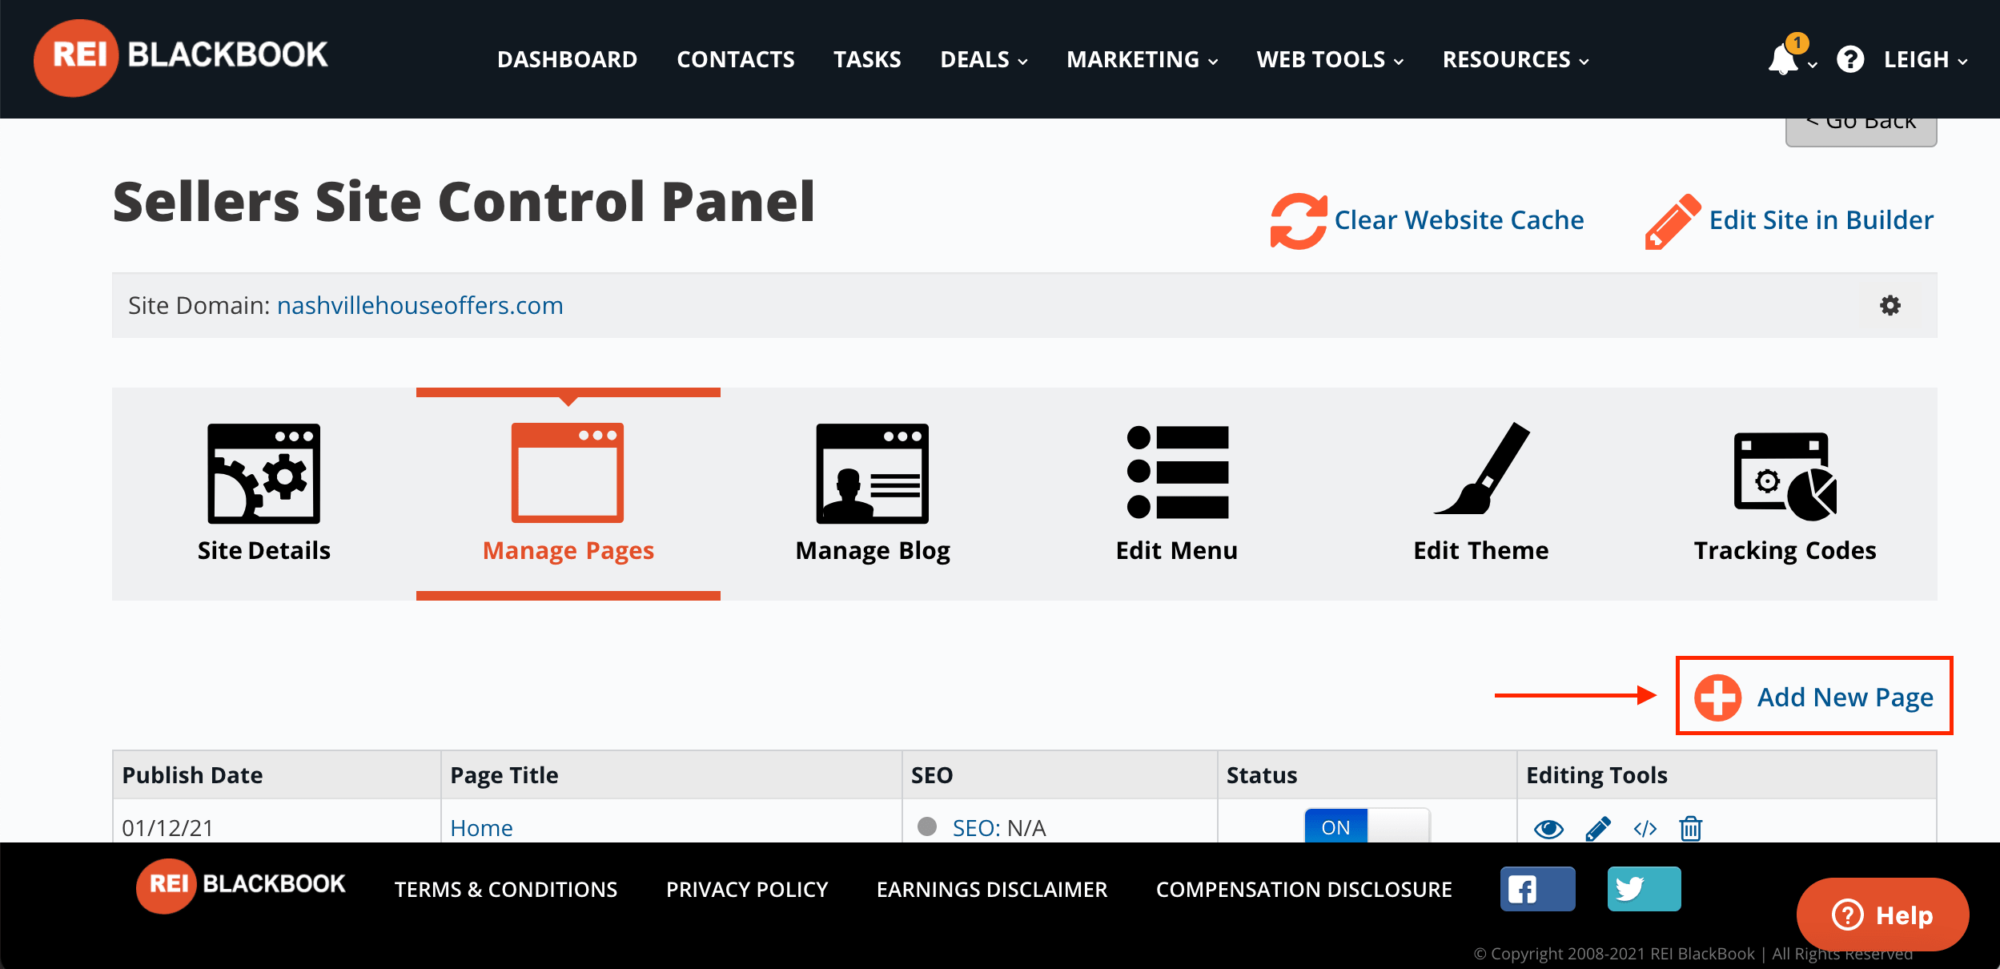
Then choose “Add a New Page” and give it a name.
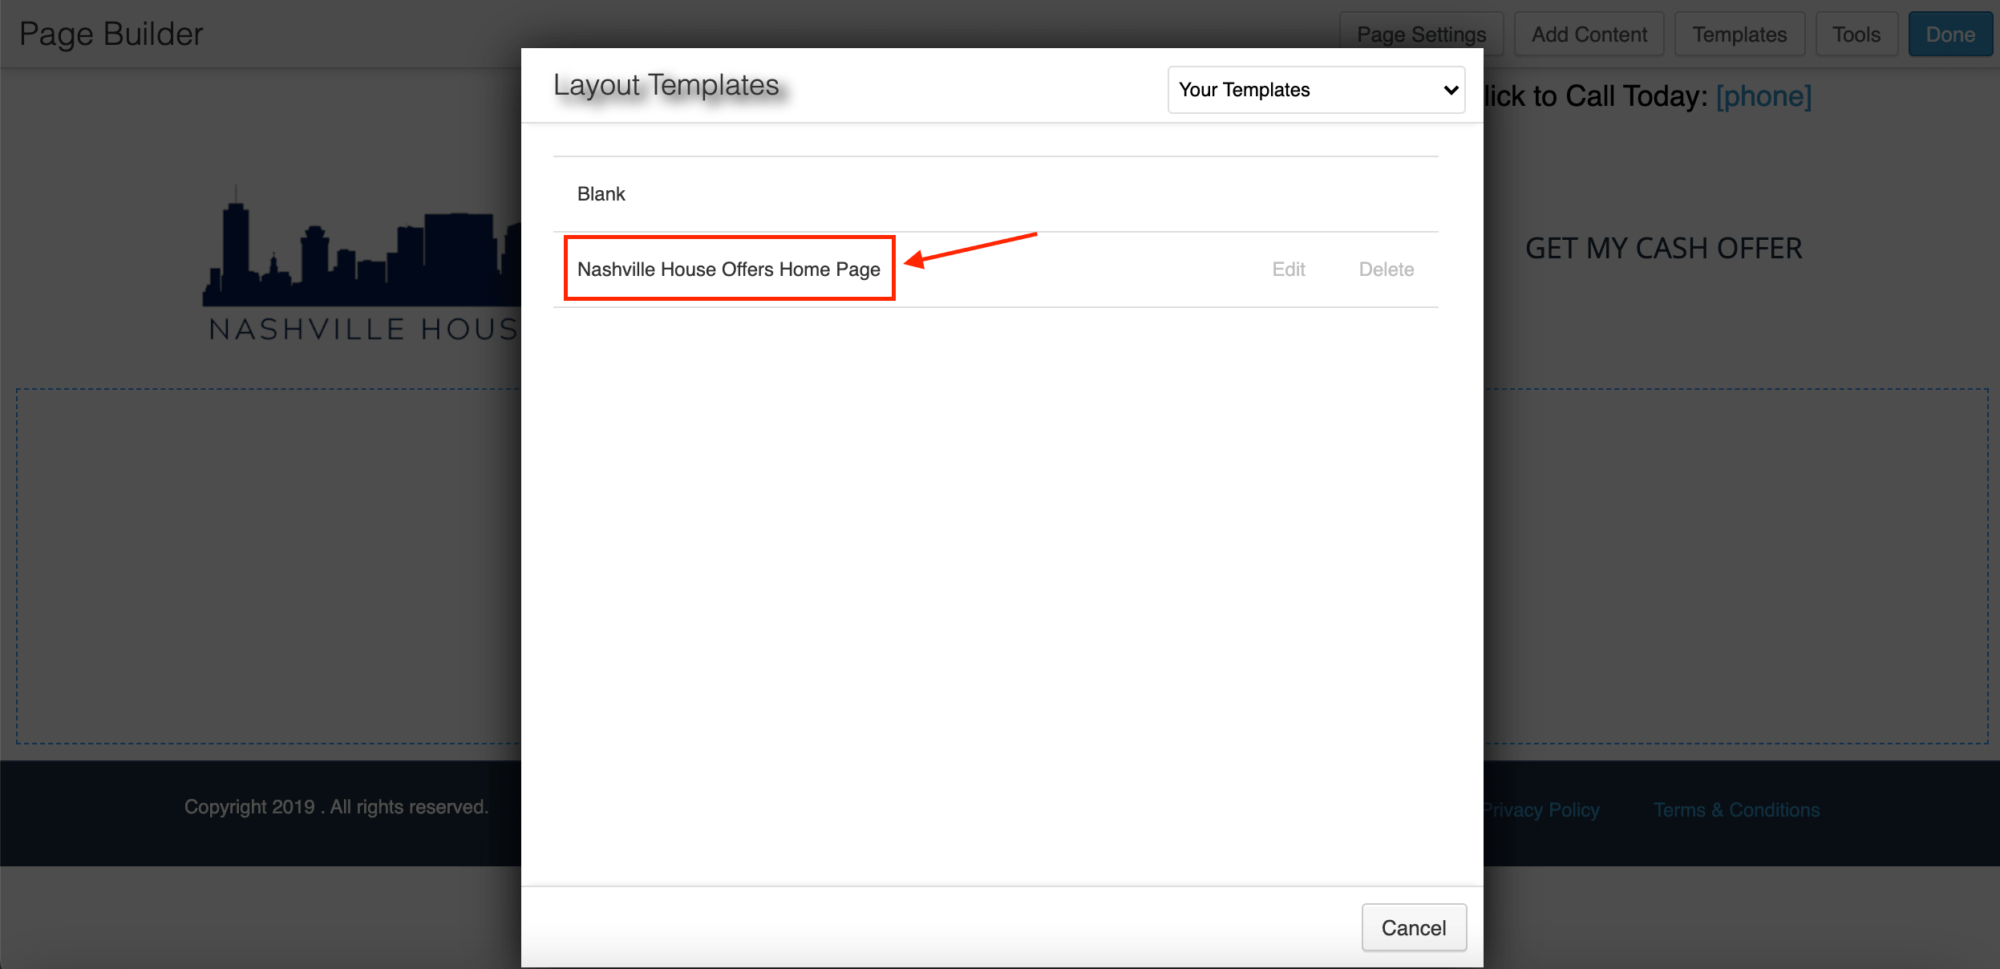
Once you've named it, you'll be asked to select a blank page or an existing layout. Choose the template you just created and then click “Replace Existing Layout”.
Now, you'll see the page template that still includes the navigation menu, (which is a problem for this particular use case.)
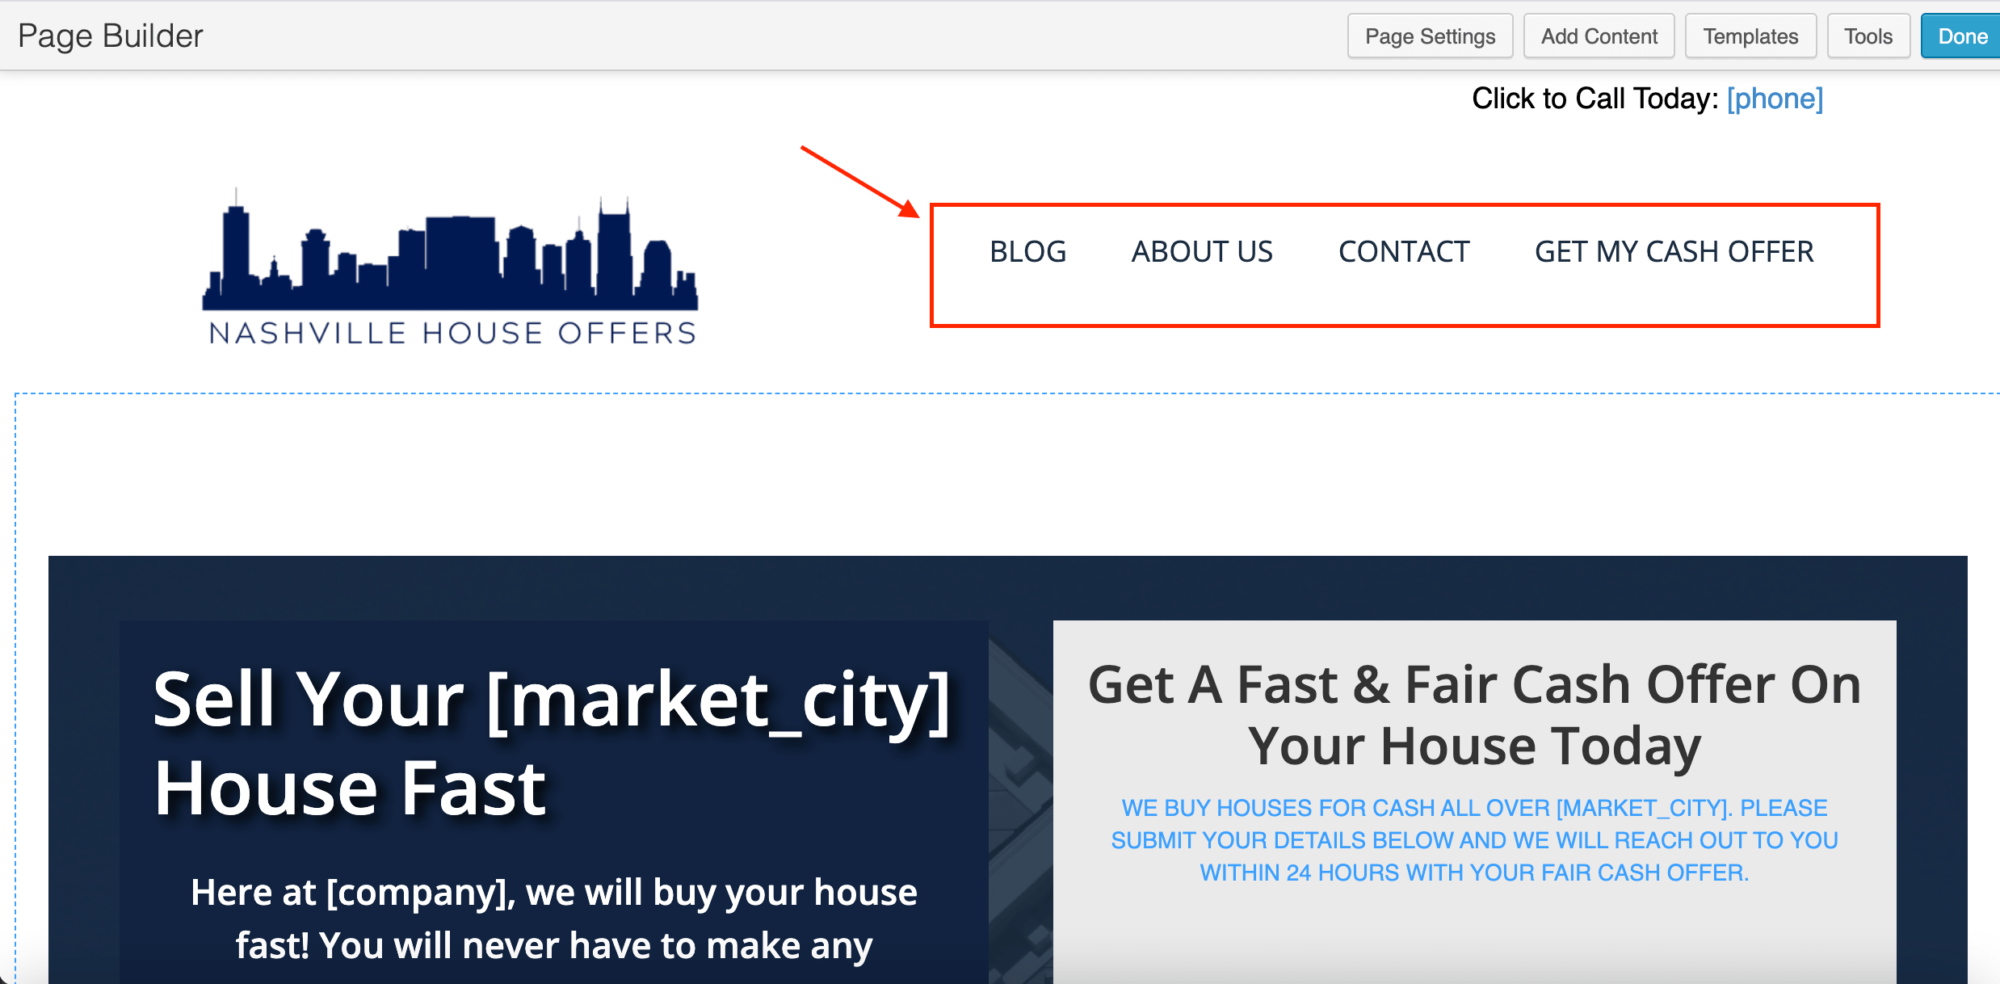
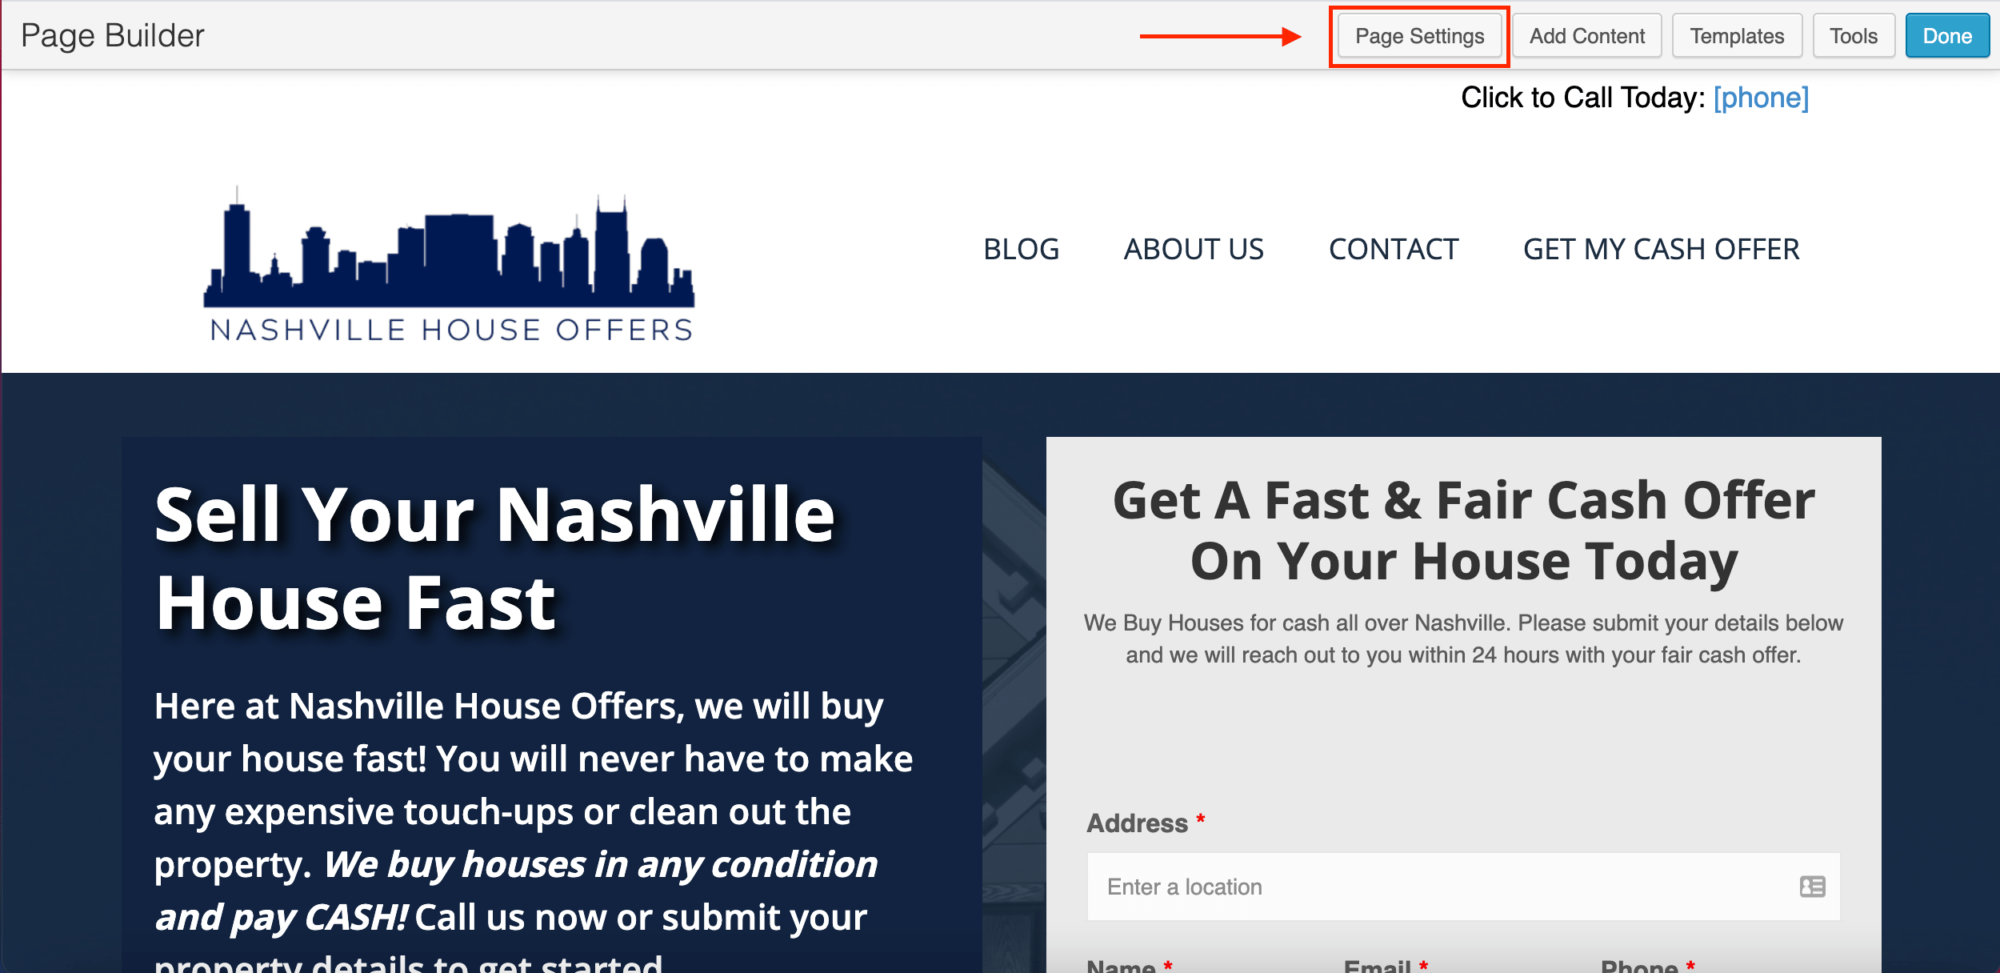
To remove the navigation, click “Page Settings”.
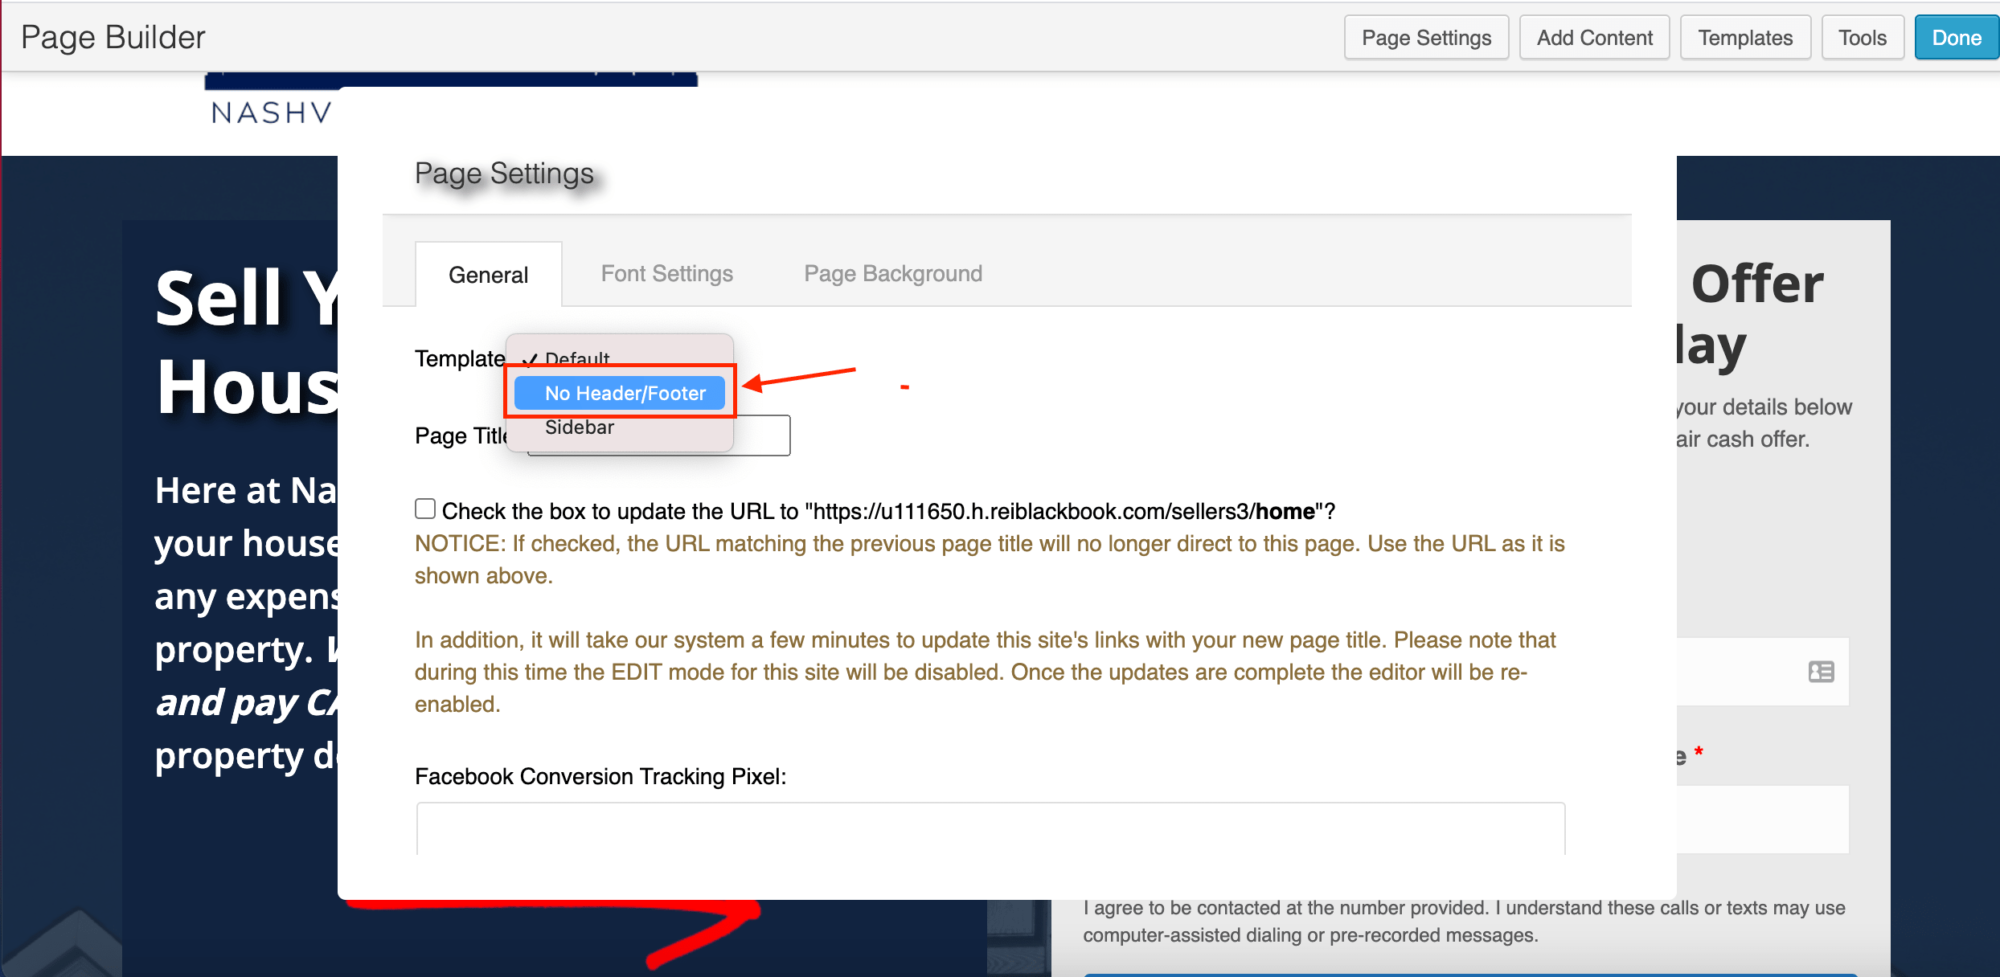
From the “Template” dropdown menu, choose “No Header/Footer” and scroll down to click save. Then reload the page.
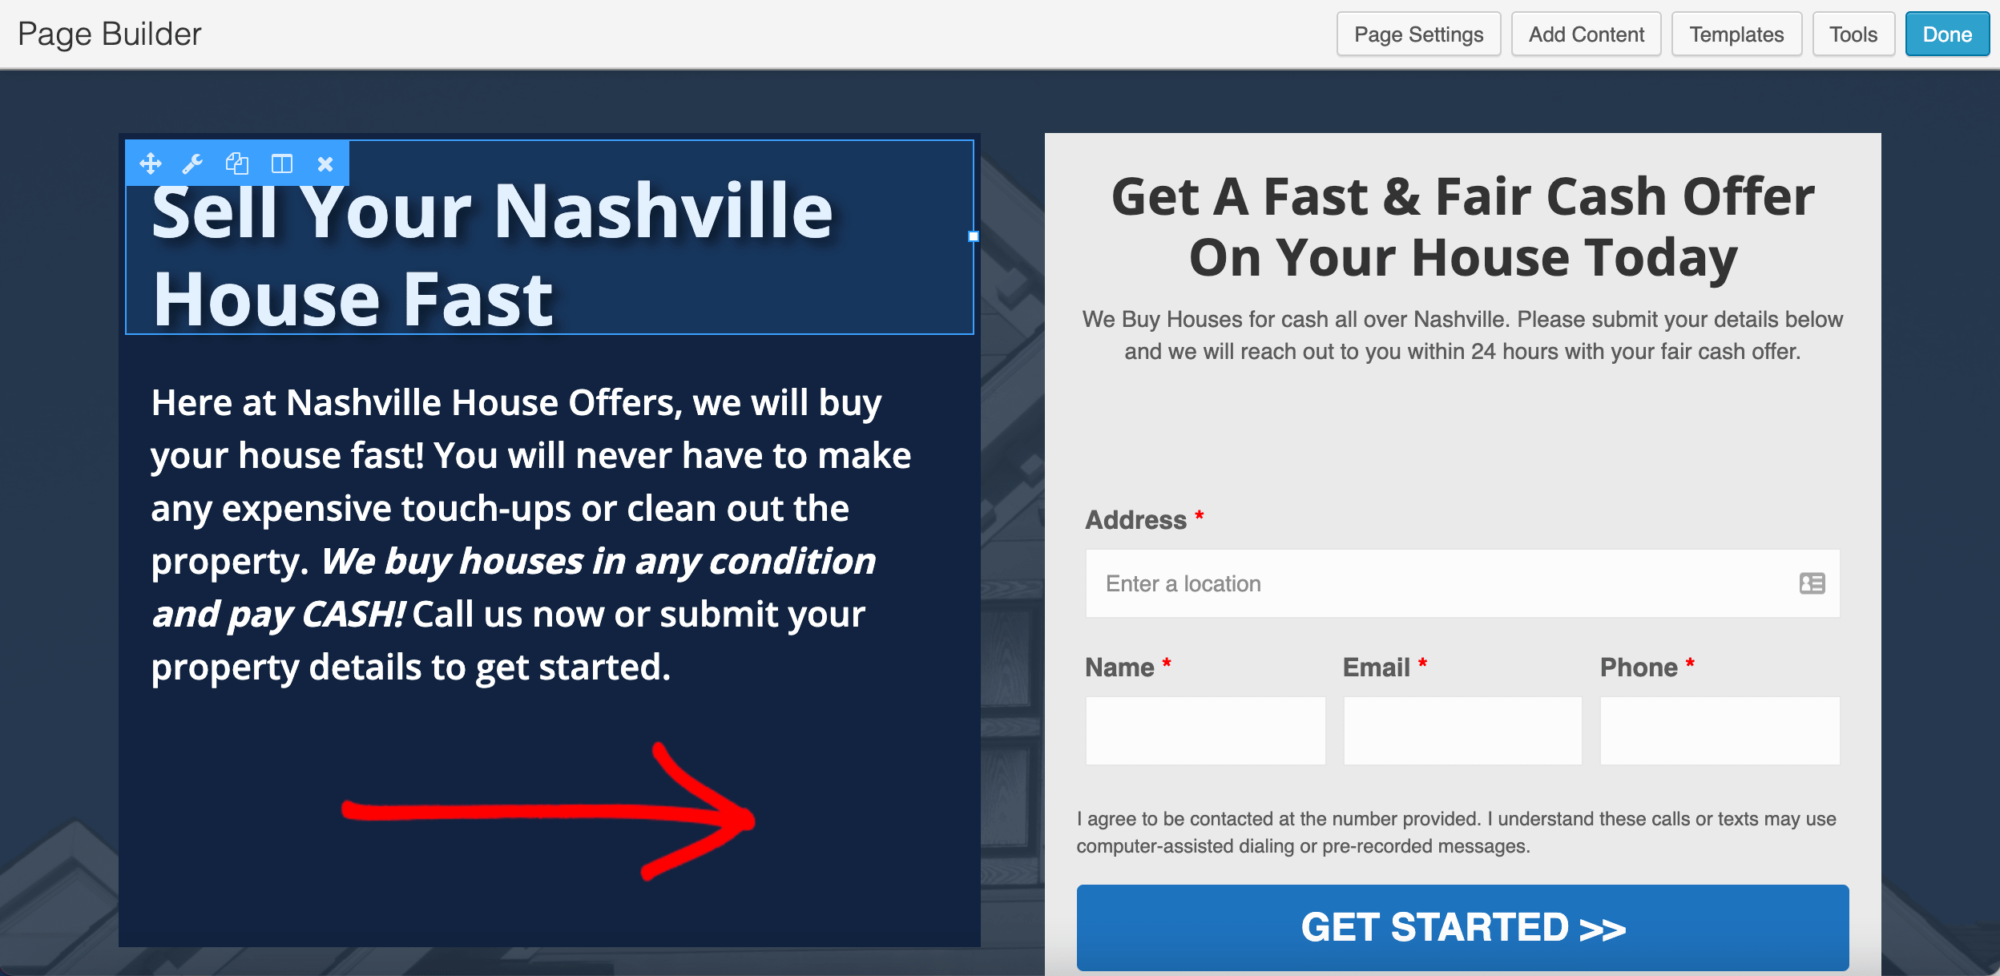
When the page loads again, you'll see the header and footer have been removed and you can now use this page as is as a landing page.
How To Add A Header Back In Without Navigation
You can also add a header back in without the navigation menu and instead, just include a phone number with a CTA to call you.
To do this, click “Add Content”.
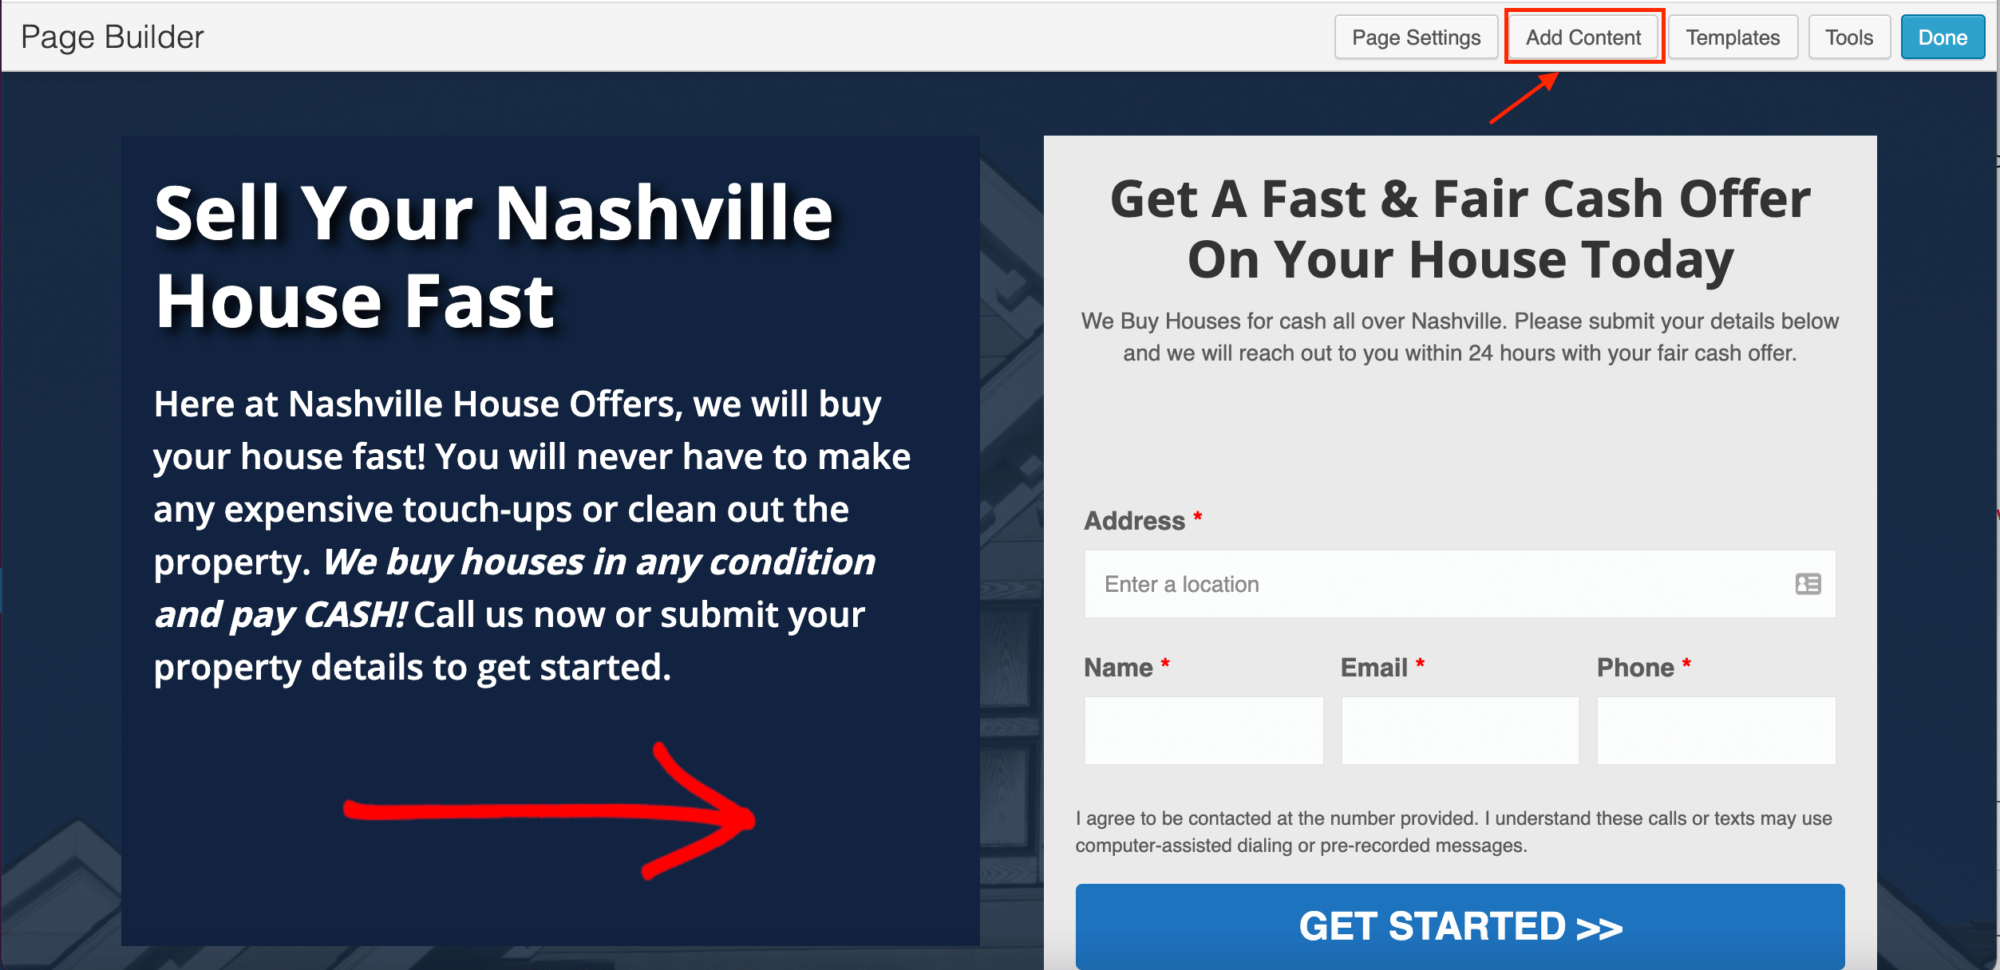
Then drag out a row layout and drop it where you'd like it on the page. In this case, we're going to use it to create a header section.
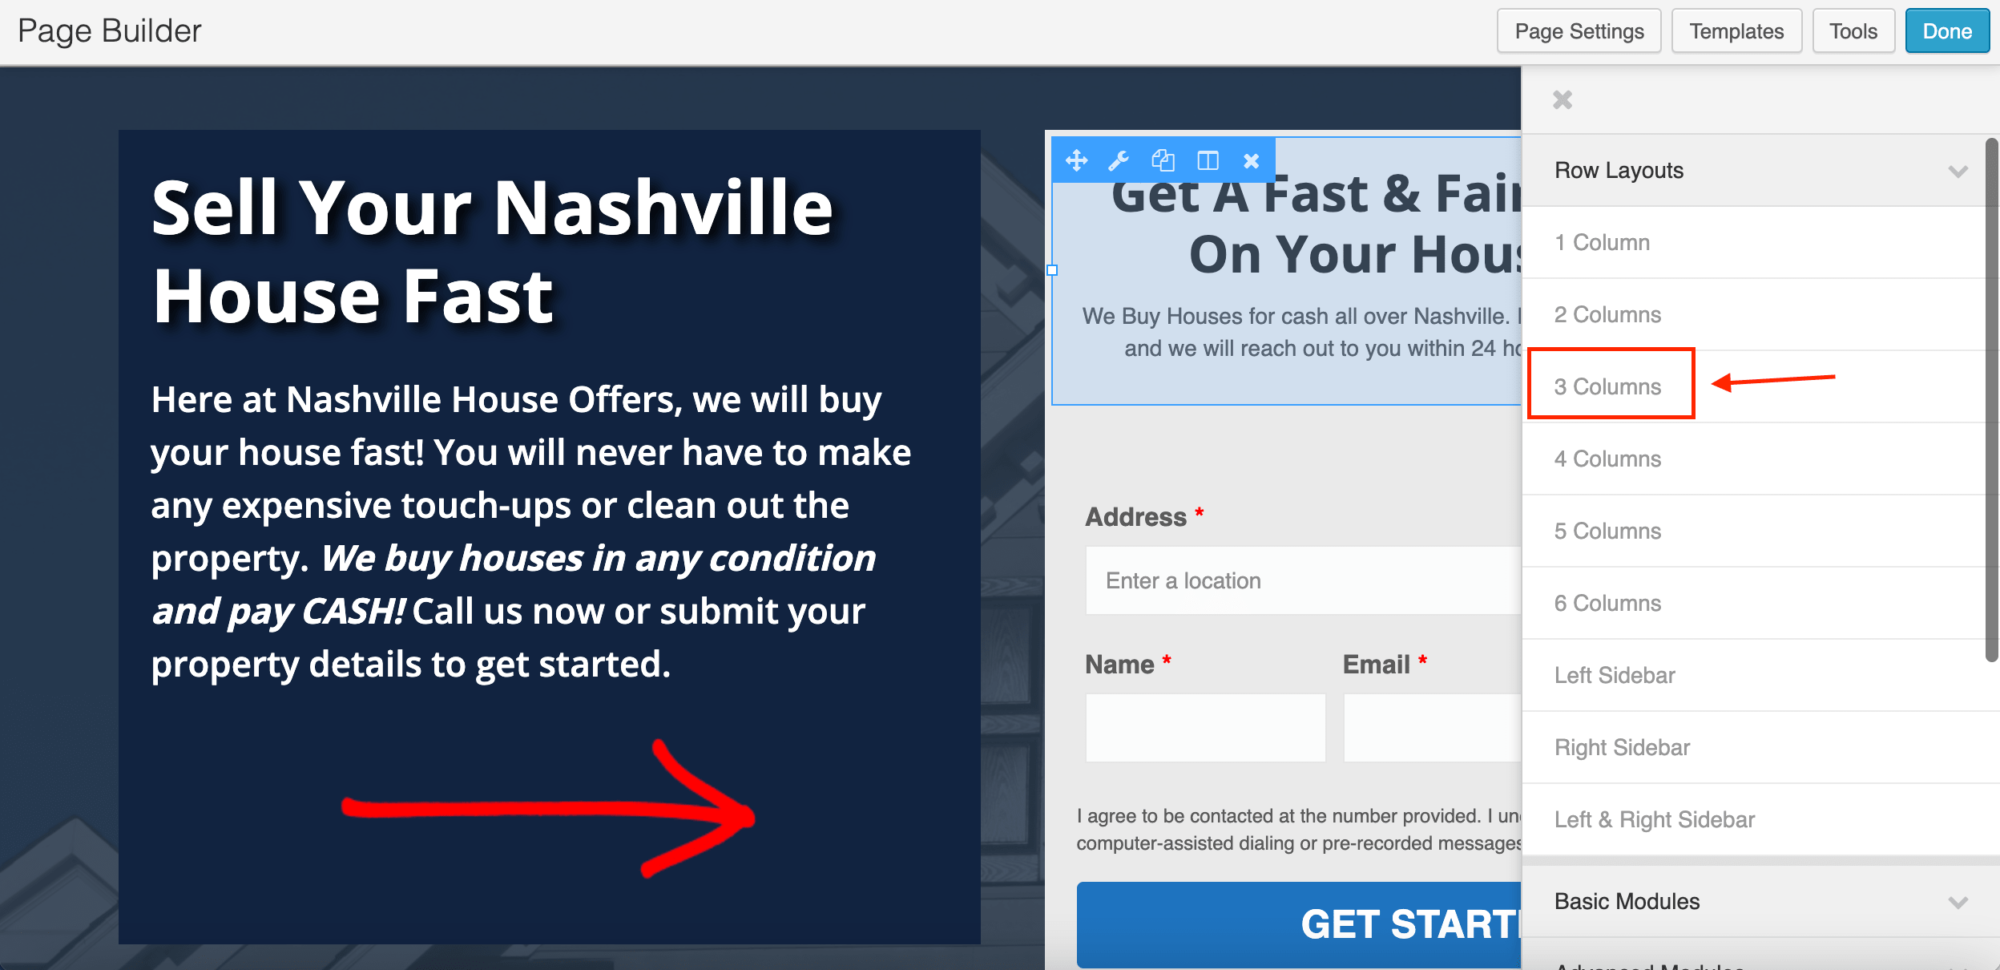
In this example, we're going to add our logo and a phone number with a CTA to our new header section.
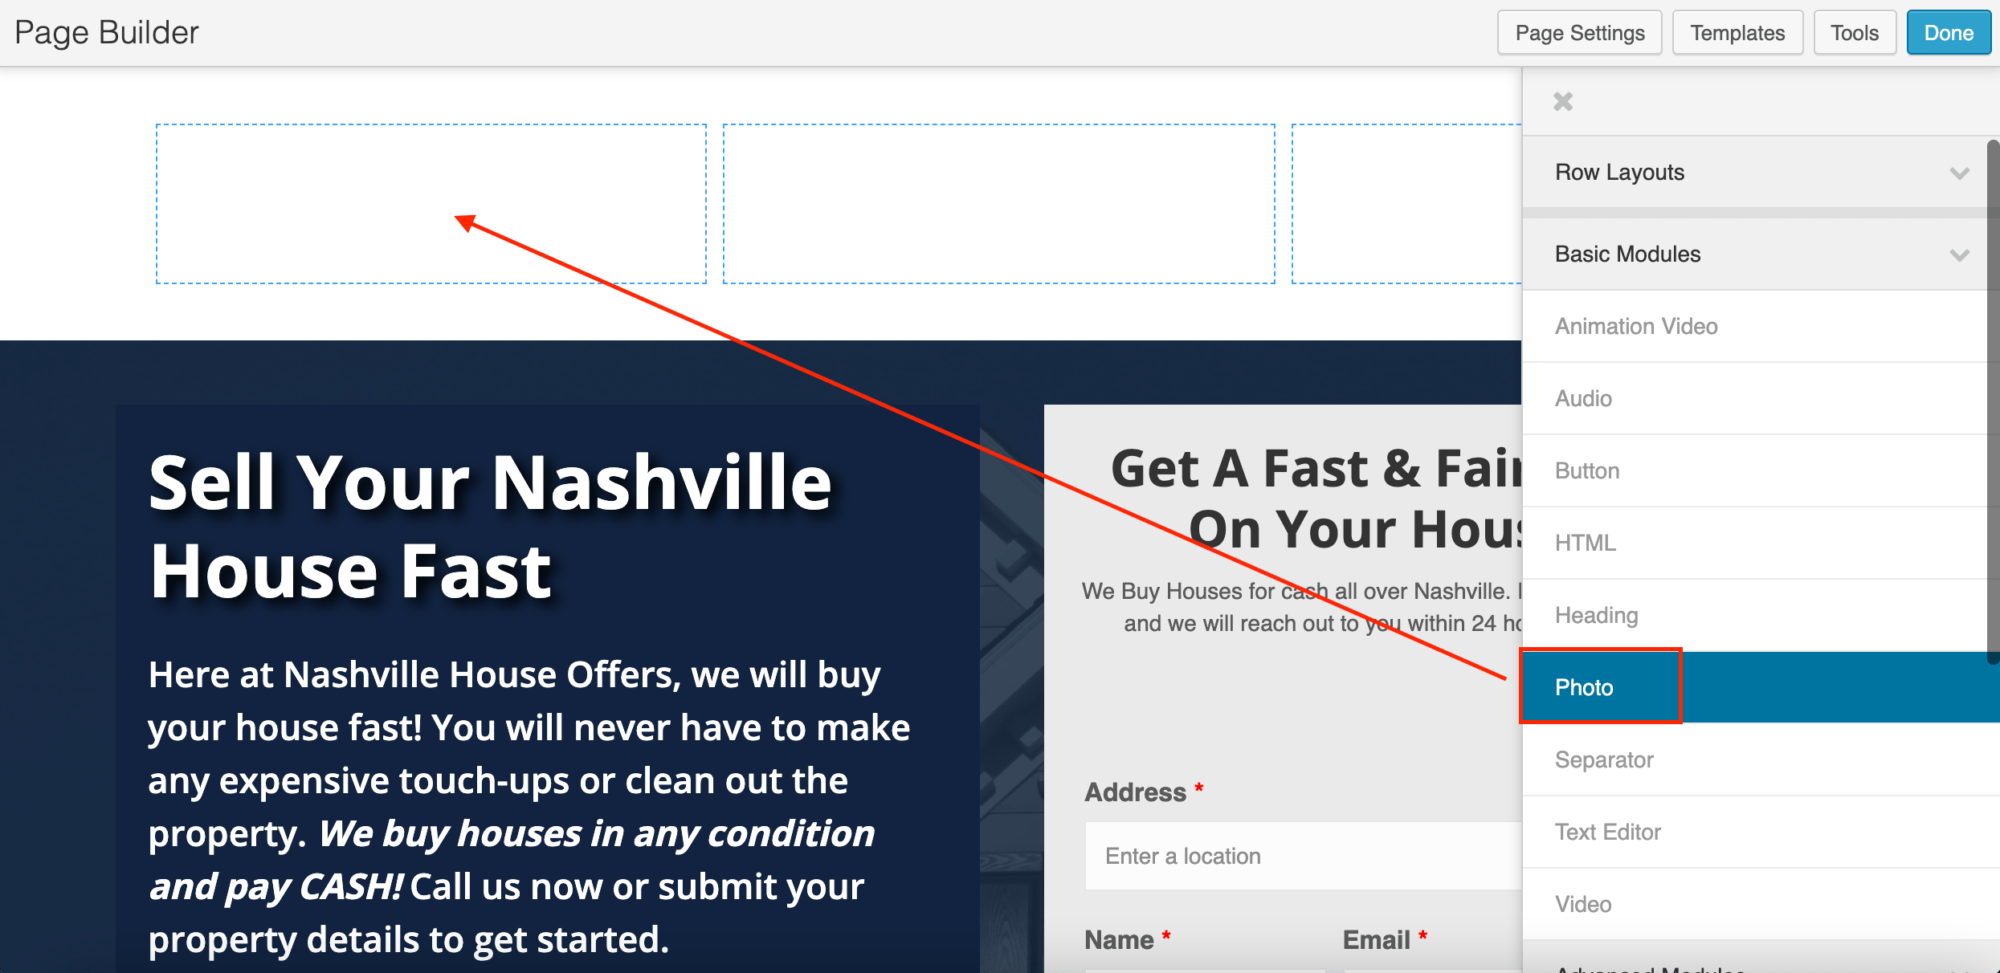
To do this, drag a photo block out to your new header section you've just created and then either select an existing photo from your library or upload one from your computer.
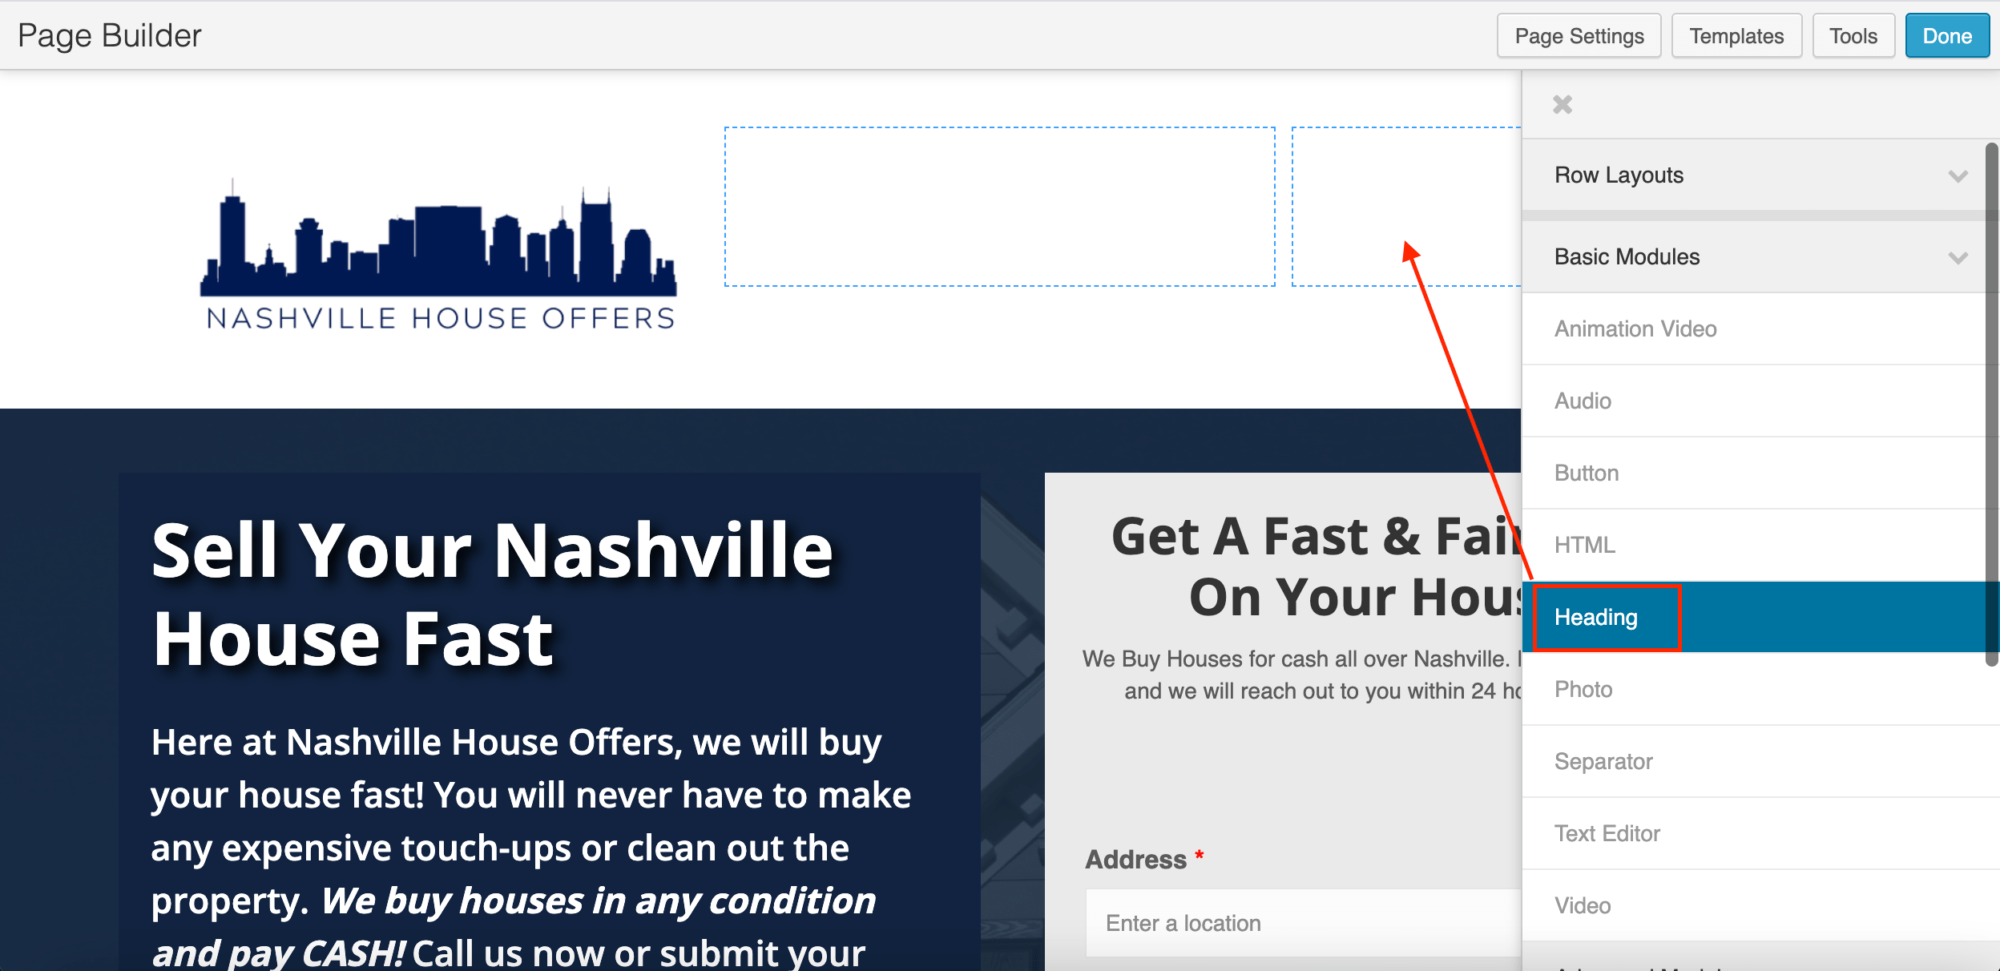
Now, to add your CTA, grab a heading and drag it to where you'd like it in your new header area.
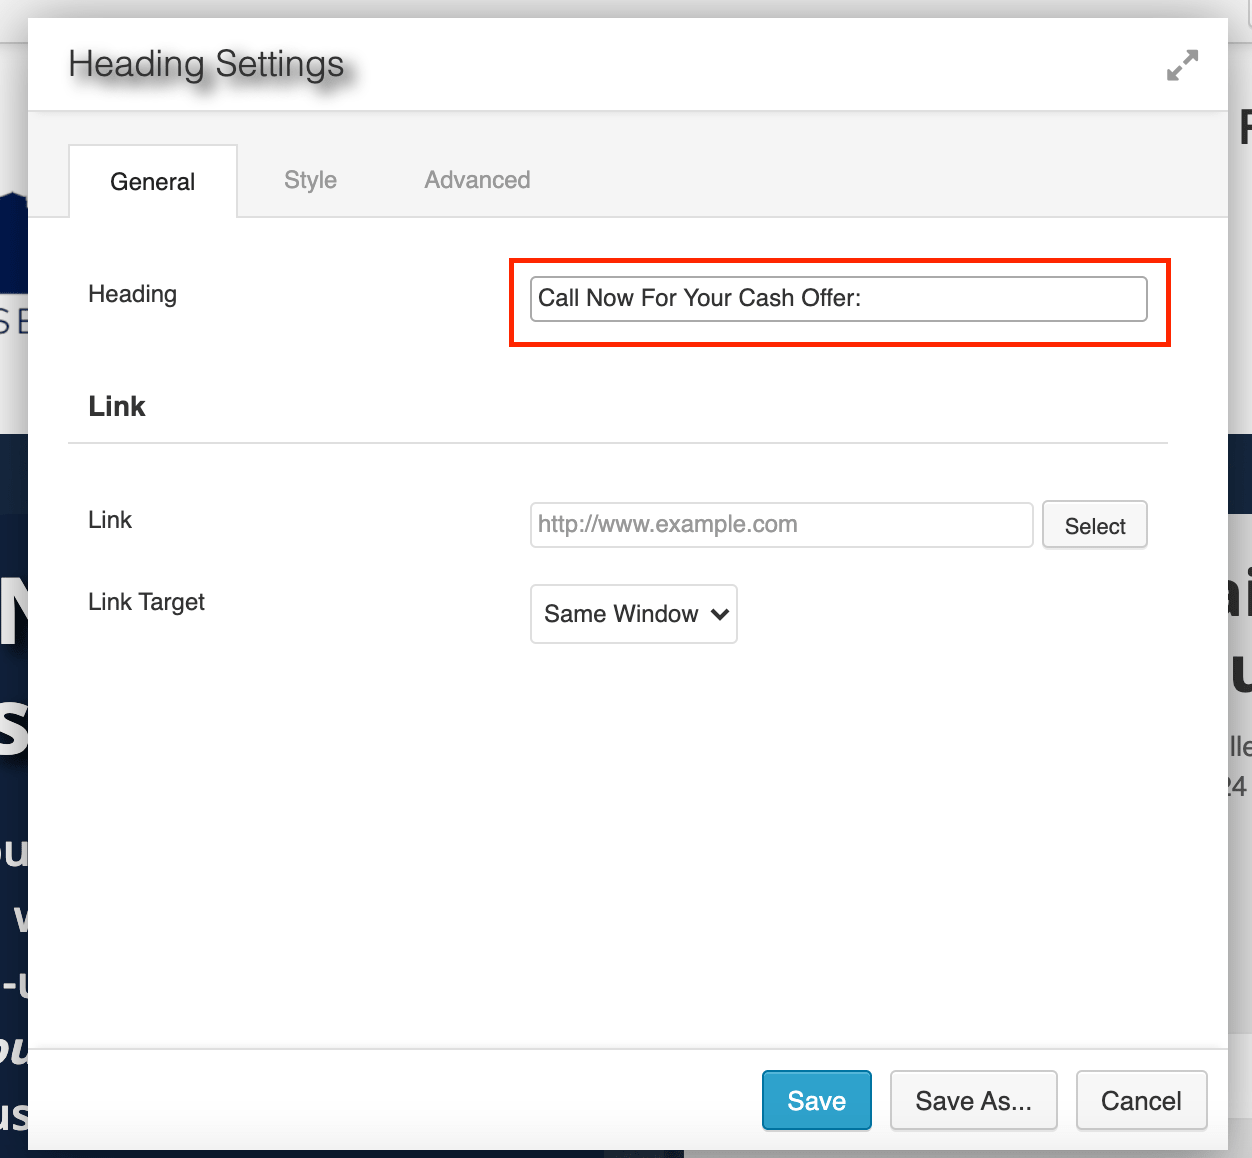
Enter your text for your call to action.
Add another Heading block and either enter the phone number you'd like them to call or use the merge field [phone] to pull the phone number in from your contact information.
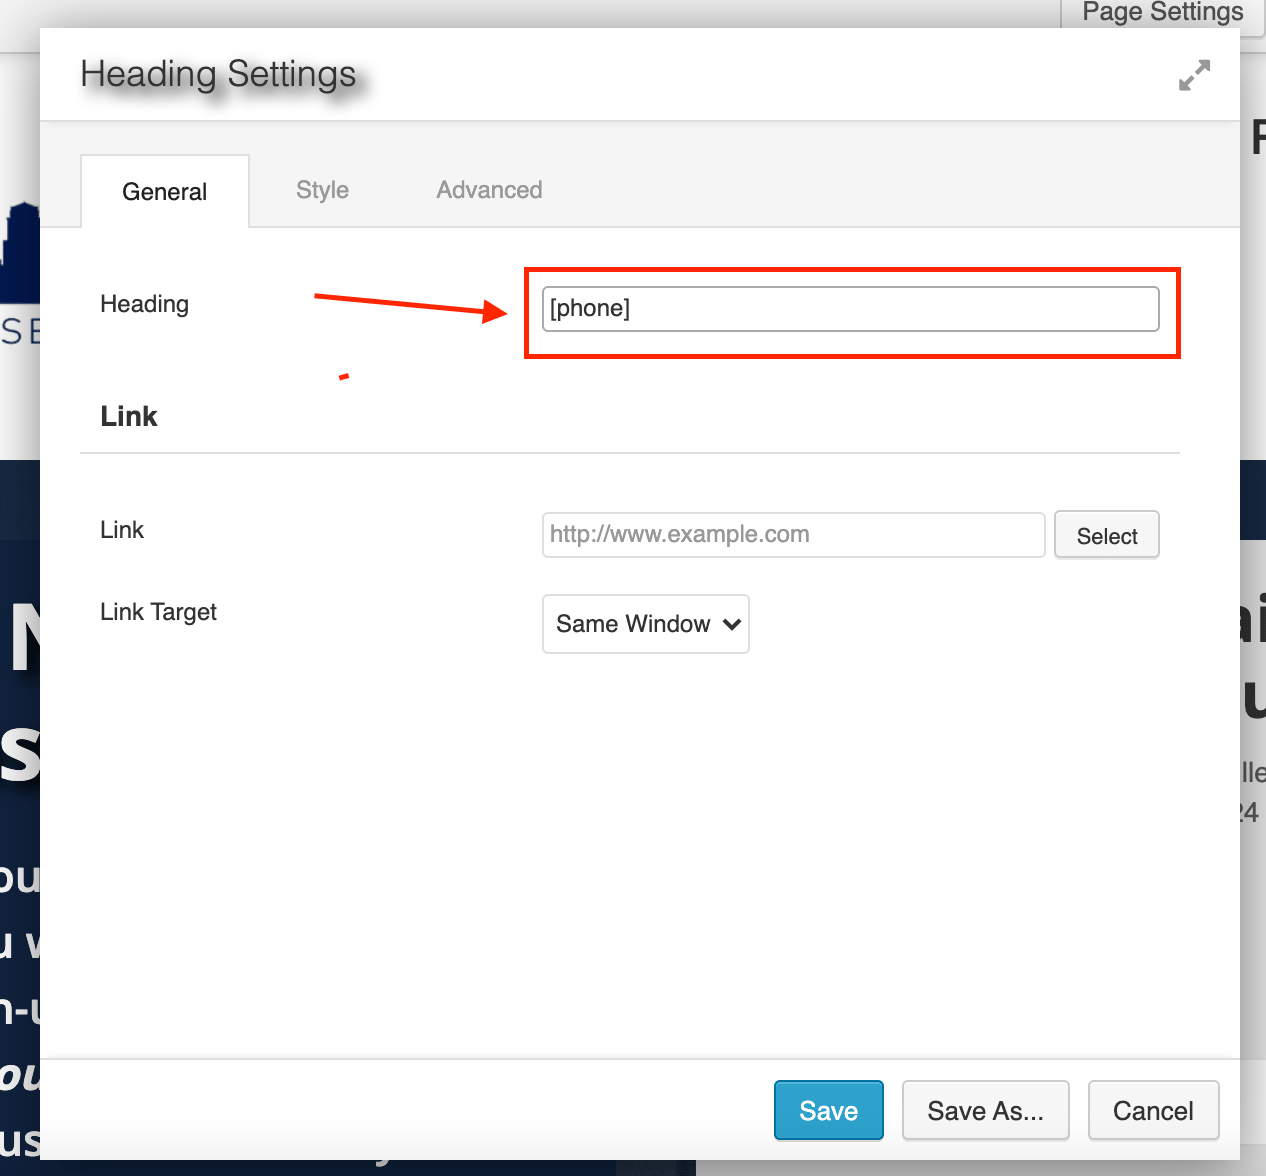
Then click “Done” and “Publish Changes”.
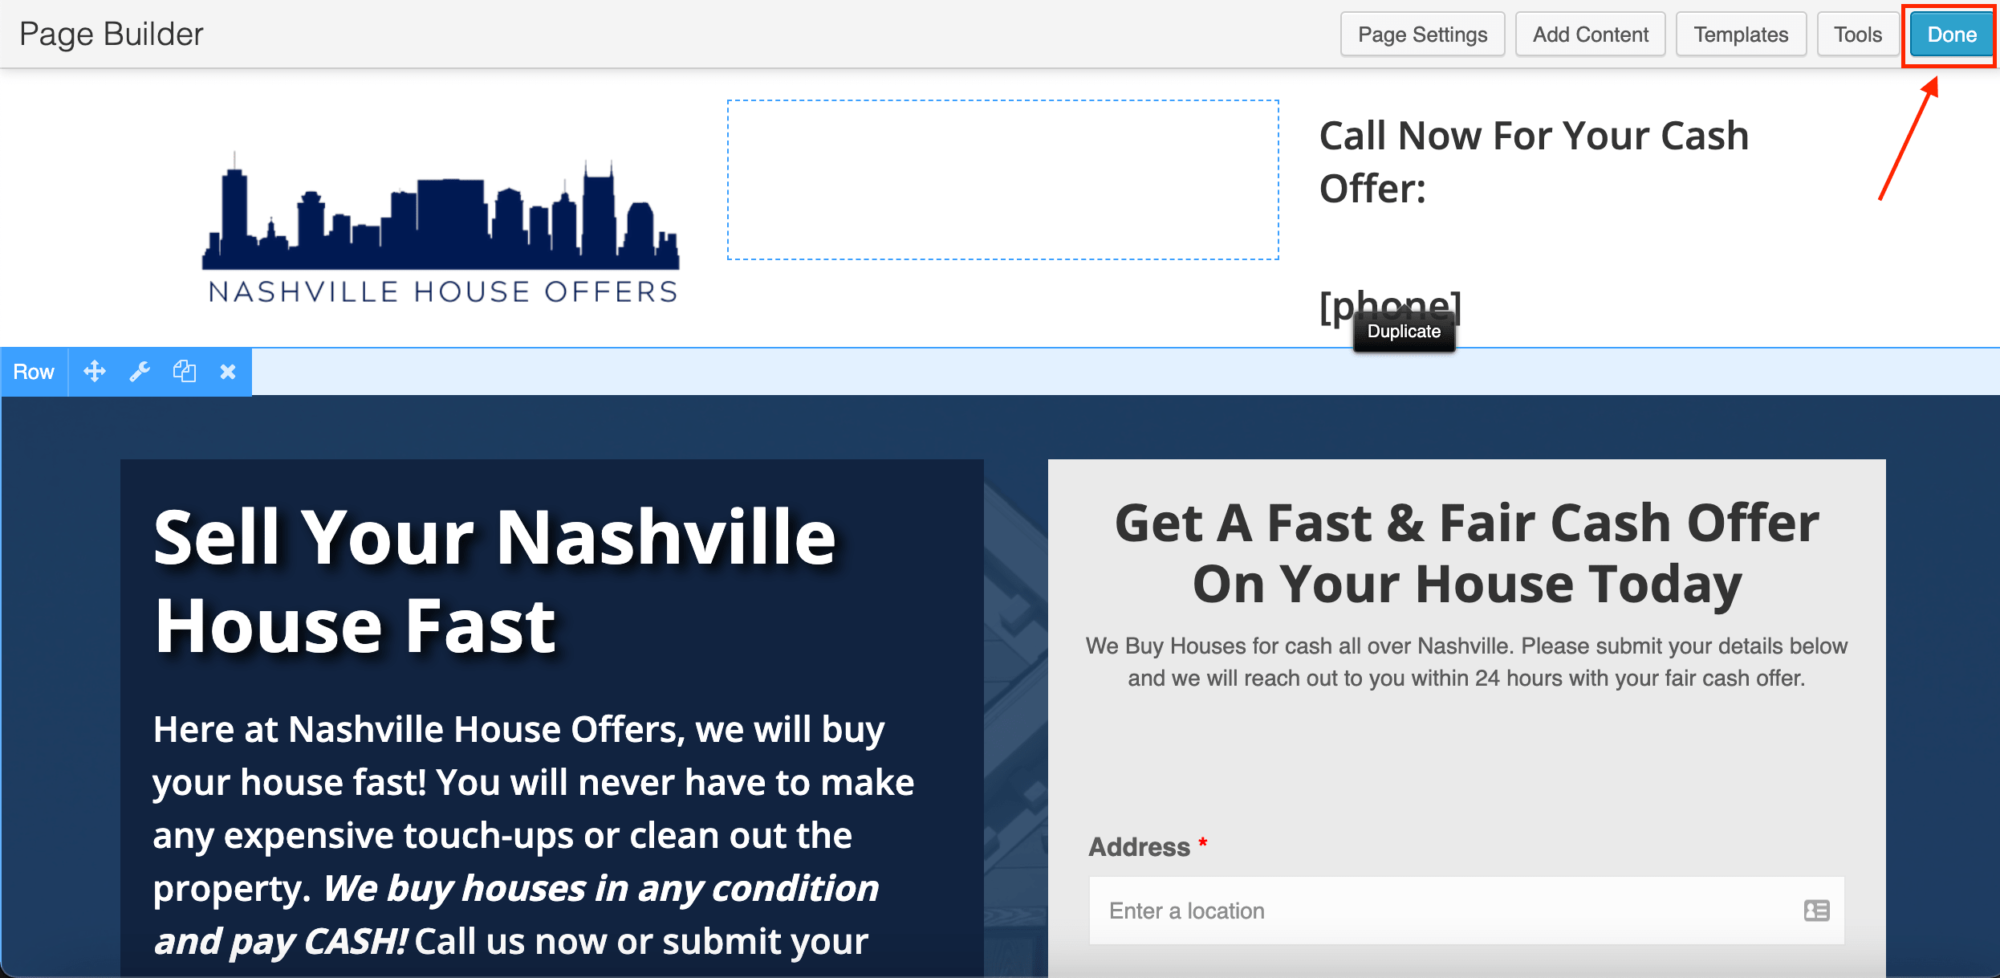
How to Customize the Hyperlink on Your REI Blackbook Landing Page
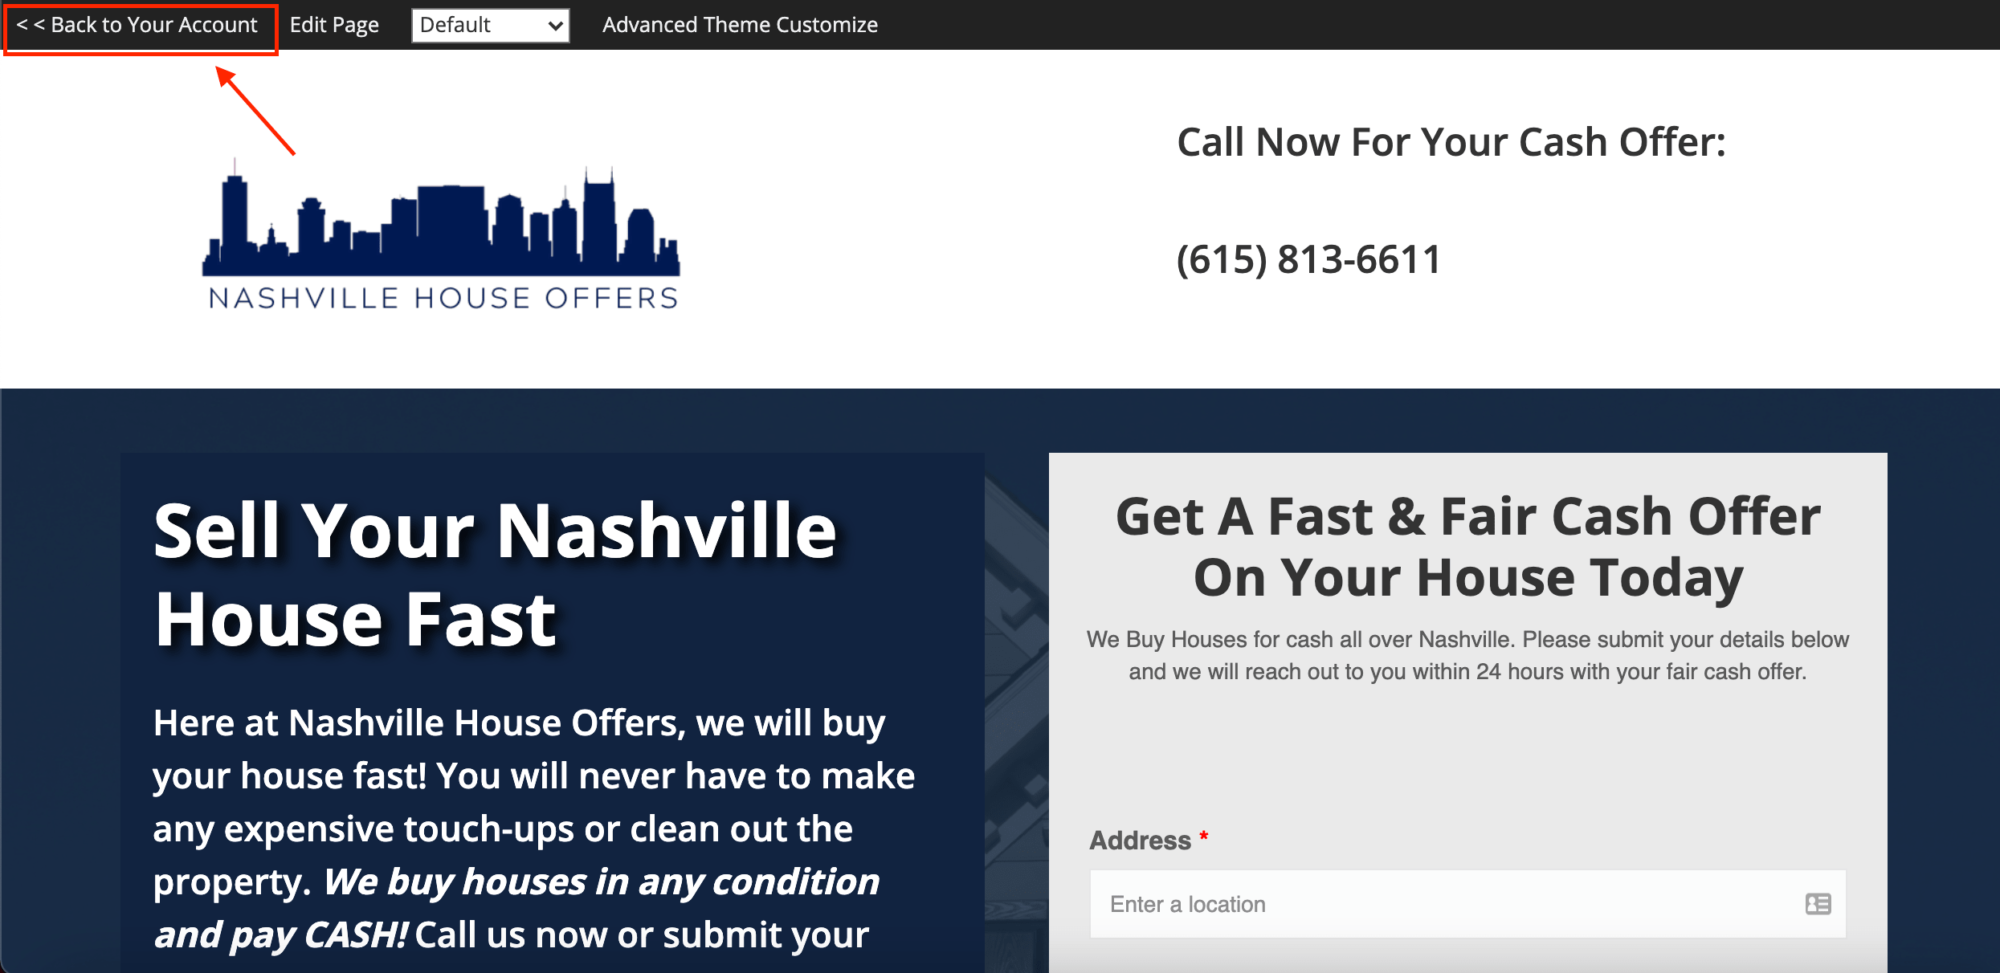
Go back to your website control panel by clicking “Back to Account”.
Click the “Manage Pages” icon again and find the page you just created, then click “SEO”.
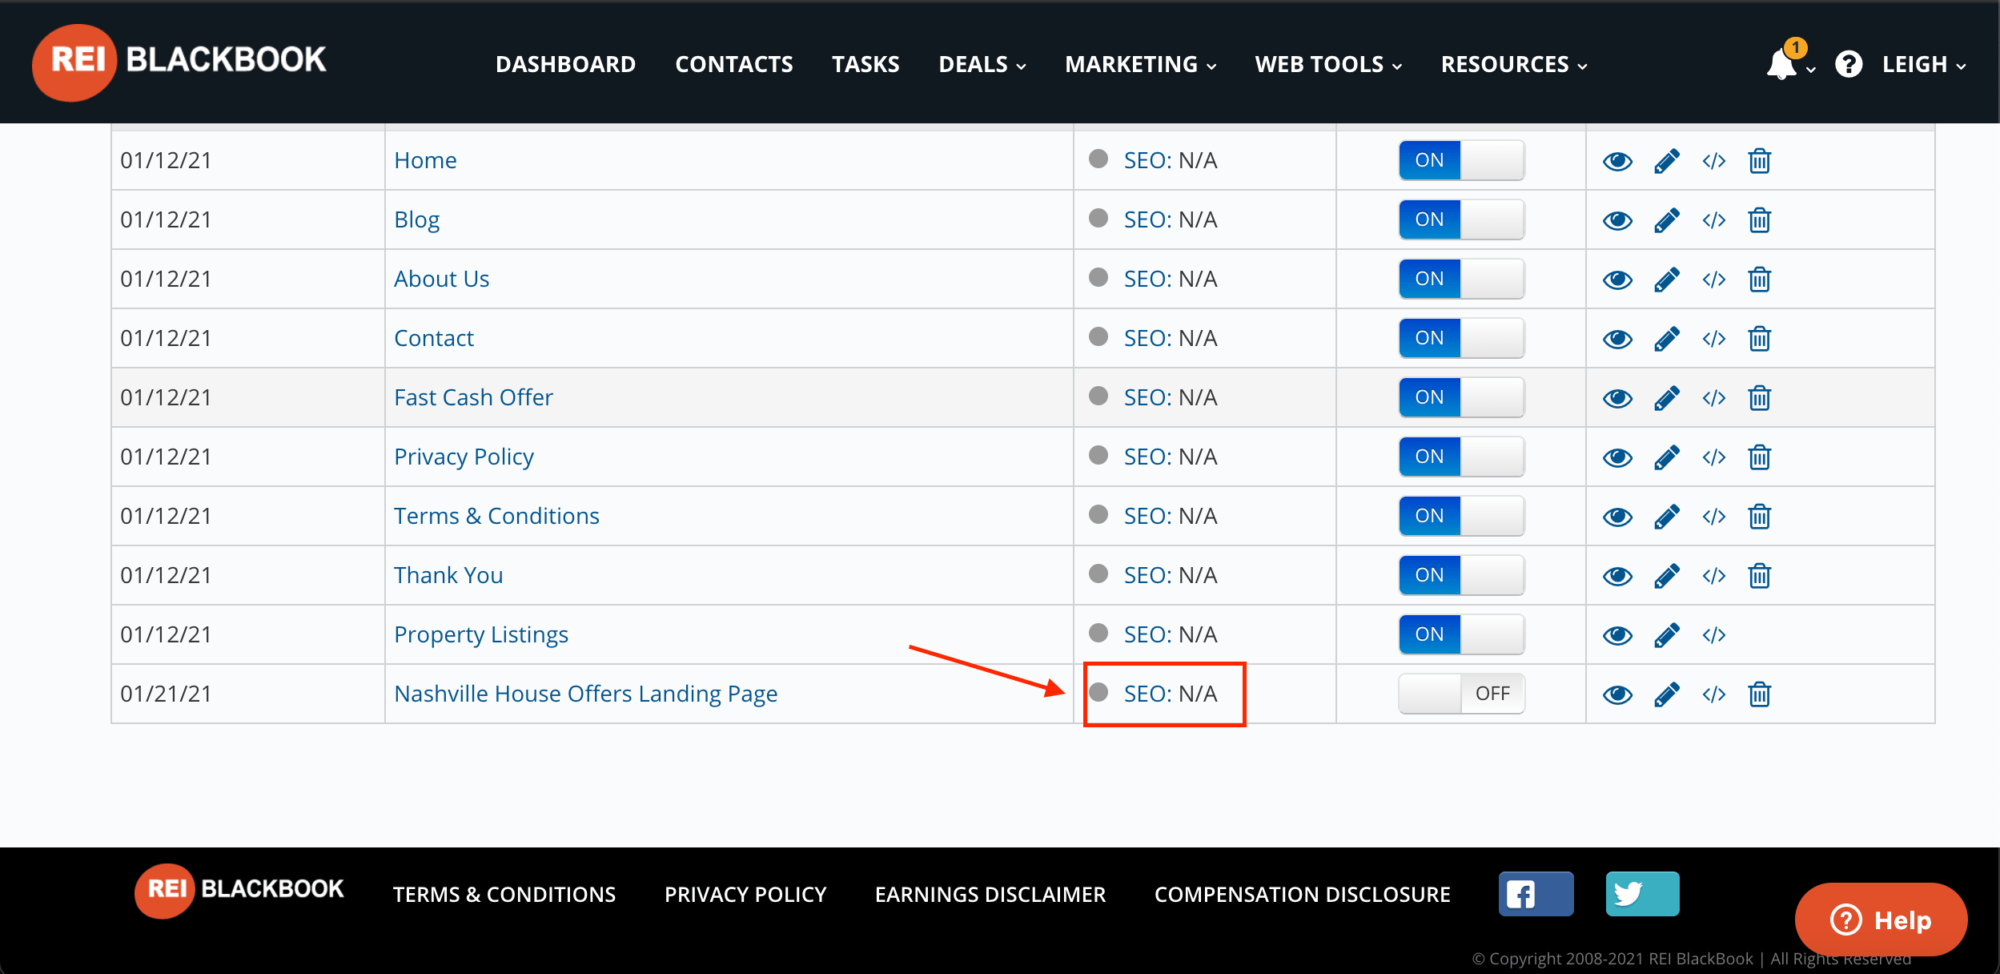
Click “Edit” and enter the custom hyperlink text.
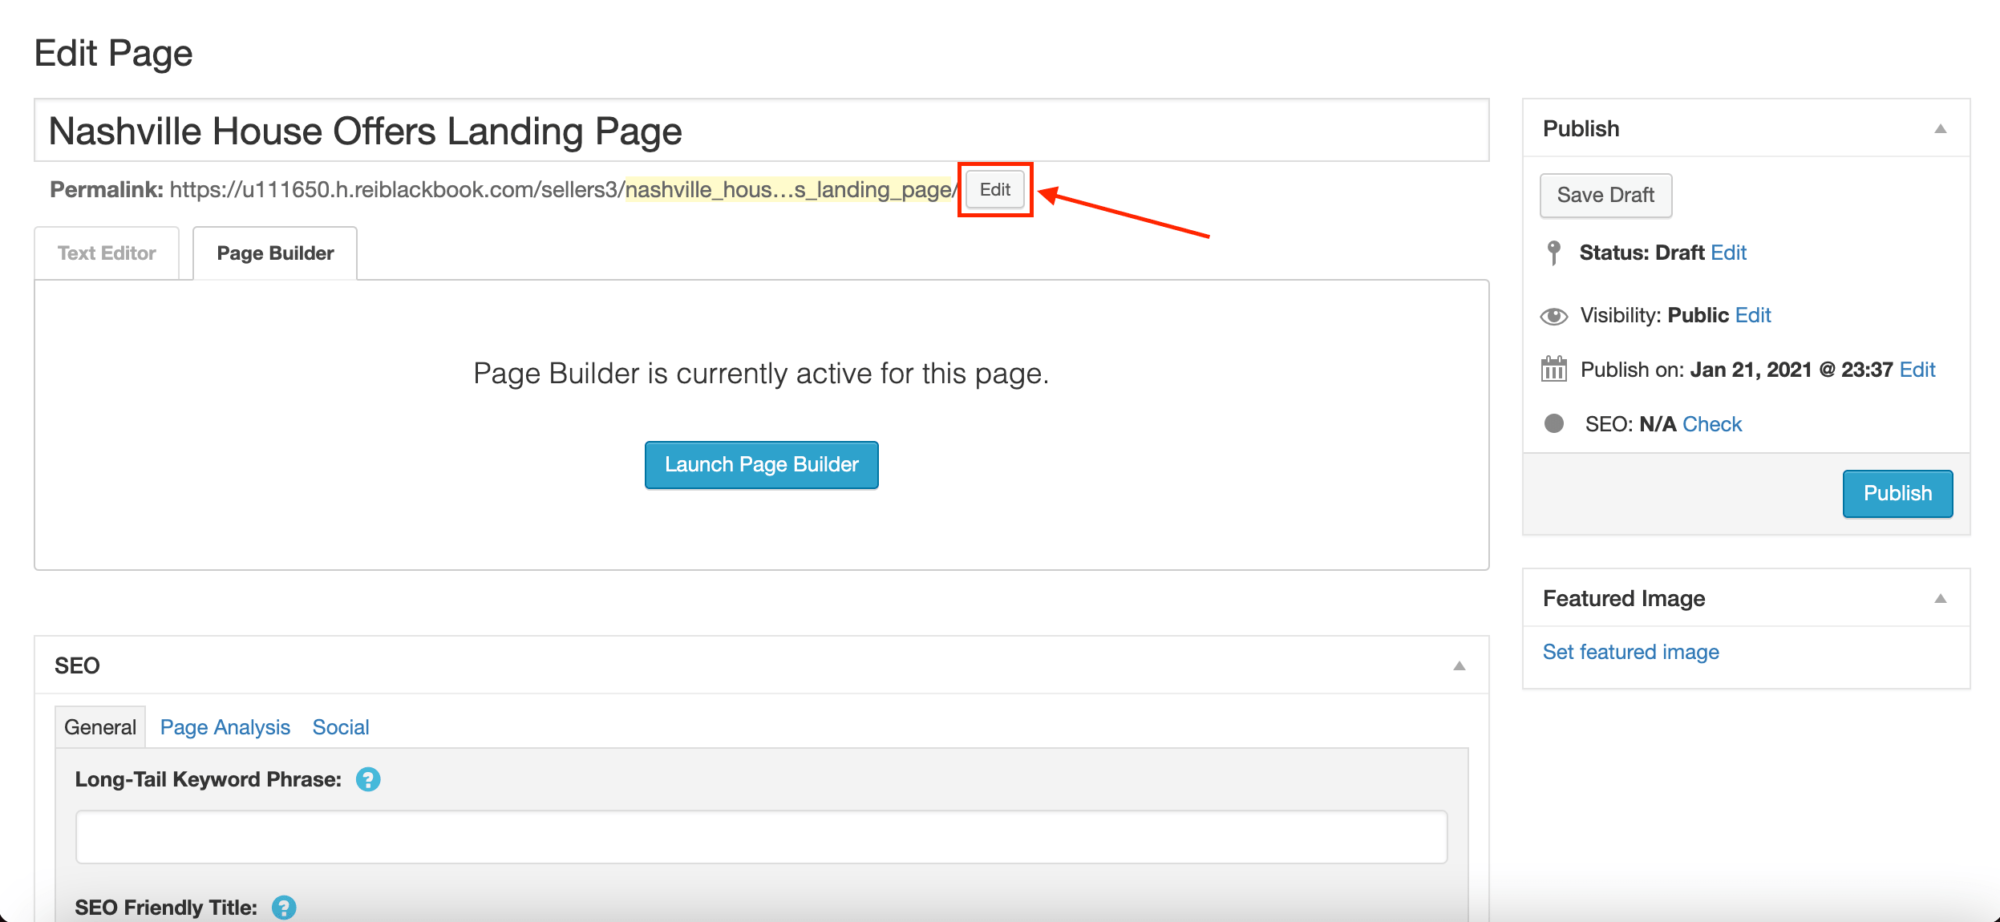
When you're done, click “Okay” and then “Publish”.
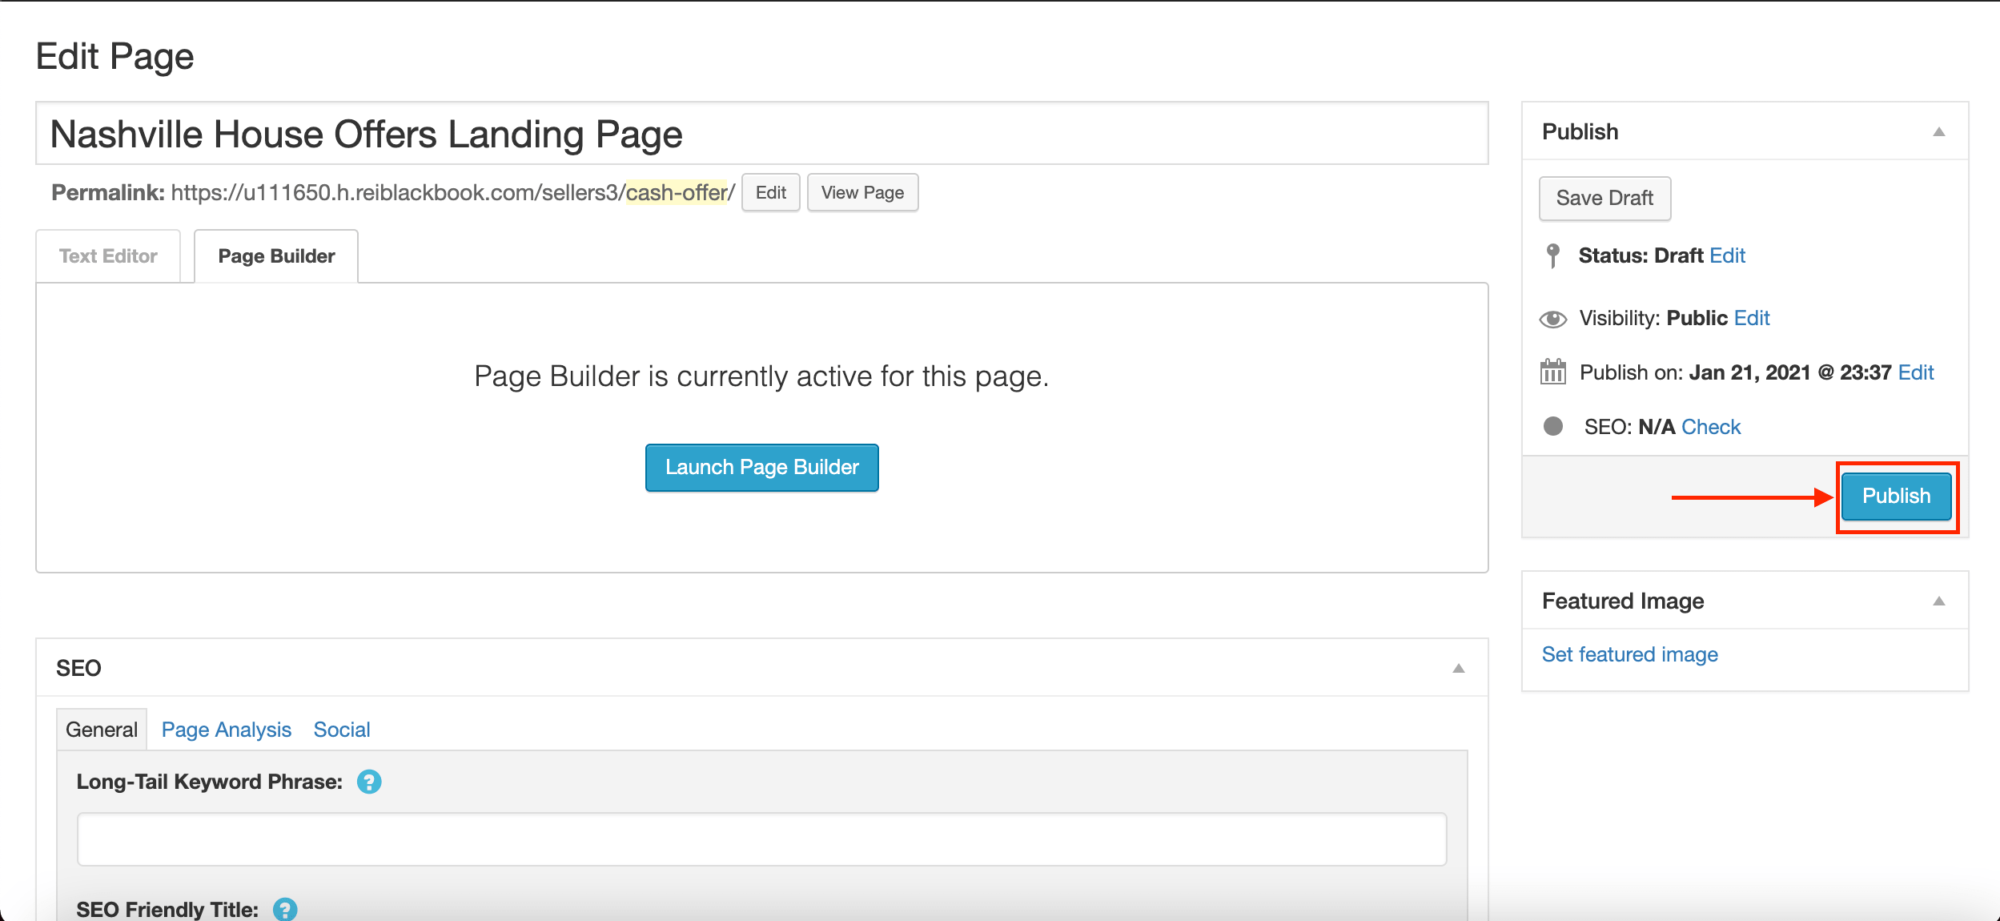
Now, when somebody lands on this page, they only have 2 options:
Either they can opt in and/or give you a call or leave.
A lot more people will opt in when you drive them to a page like this rather than to the home page of your website.
Home pages tend to convert at around 2-3% where landing pages typically can convert at much higher rate: around 15-25% depending on the source of traffic.
So if you're driving paid traffic to a page online, you want to send them to a page like this one that's optimized to convert leads for your business.
The more leads you generate, the more deals you can close.
Want to learn more? Grab a free on-demand demo of REI Blackbook and find out how are our marketing automation can convert your leads into deals on autopilot.
What You Should Do Now:
- Get started with REI Blackbook for FREE: Get 14 days FREE access to our software and start converting more leads into deals.
- If you'd like to learn the exact strategies our power users are implementing to generate motivated seller leads consistently, check out our Motivated Seller Guide.
- If you'd like to learn how our team can build out your REI Blackbook system FOR you, head to our implementation page.
- If you know another real estate investor who'd enjoy reading this page, share it with them via email, Linkedin, Twitter or Facebook.
Recent Blog Posts
Unlock the System Top Investors Swear By—Take Back Your Life with a 14-Day Free Trial
Automate Your Business. Close More Deals. Enjoy More Freedom.
- Automate Everything – Put your business on autopilot, from lead follow-up to closing.
- Close More Deals – Use AI tools to quickly spot and lock in the best opportunities.
- Reduce Stress – Streamline your workflow so nothing falls through the cracks.
No long-term commitments. Cancel Anytime
Real Results from Real Investors


